
Testing Locally
Overview
In this section, we will configure and run the Demo Miniapp locally for testing. This allows you to develop and debug your Miniapp before deploying it to a remote server.
How Local Testing Works
Local testing requires running both the backend and frontend simultaneously on your machine. Here's how it works:
- The backend runs on your machine and exposes an API
- The frontend runs on your machine and connects to the backend
- Your phone (with Super Qi UAT) scans the QR code and loads the frontend
- The frontend communicates with the backend over your local network
Backend Configuration
The backend requires credentials to communicate with the Super Qi APIs.
Step 1: Create the .env File
Navigate to the backend directory and create a .env file (Below is bash command, but select whether you want to run NodeJS or Go):
cd superqi-demo-miniapp/backend-go
touch .env
cd superqi-demo-miniapp/backend-node
touch .env
Step 2: Get Credentials
Obtain your UAT credentials following the instructions in the UAT and Credentials guide.
Add the following variables to your .env file (both the Go and Node.js backends use the same format):
# Gateway Configuration
ALIPAY_GATEWAY_URL=<your Gateway URL>
ALIPAY_CLIENT_ID=<your Client ID>

# RSA Keys — paths to the key files you save in Step 3
ALIPAY_MERCHANT_PRIVATE_KEY_PATH=<path to your private key>
ALIPAY_PUBLIC_KEY_PATH=<path to your public key>

# Token Encryption — a 32-byte key required by the demo backend
JWT_KEY=<32-byte key for JWE>
.env — so it does not appear here.Step 3: Save Your Keys
You receive only the private key from the Miniapps team. Obtain the matching public key for your environment from the Signature Validation guide. Save both key files in the backend directory and reference their paths in your .env file (ALIPAY_MERCHANT_PRIVATE_KEY_PATH and ALIPAY_PUBLIC_KEY_PATH).
Step 4: Save the .env File
After adding all the required credentials, save the .env file. Your backend is now configured.
Step 5: Install Dependencies
Install the required dependencies for your backend:
go mod download
npm install
Step 6: Run the Backend
Start the backend server by running the following command:
go run main.go
npm run dev
The server should now be up and running. Keep this terminal open.
Frontend Configuration
The frontend needs to know the IP address of the machine running the backend so it can make API requests.
Step 1: Get Your Machine's IP Address
Open a terminal and run the following command to get your machine's network IP address:
macOS/Linux:
ifconfig | grep "inet " | grep -v 127.0.0.1
Windows:
ipconfig
Look for the IP address that is not 127.0.0.1 (loopback). This is your machine's IP on the local network (e.g., 192.168.1.100).
127.0.0.1 or localhost, the phone will look for the backend on itself (the phone), not on your machine. You need to use your machine's network IP address so the phone can reach the backend over the network.Step 2: Update BASE_URL
Open the file common/main.js in the frontend directory:
cd superqi-demo-miniapp/frontend
Find the BASE_URL variable and update it with your machine's IP address:
// Before
const BASE_URL = "http://localhost:8080";

// After (replace with your IP address)
const BASE_URL = "http://192.168.1.100:8080";
Step 3: Save the File
Save the main.js file after updating the BASE_URL.
Step 4: Update the dependencies
npm install
Step 5: Run the Frontend
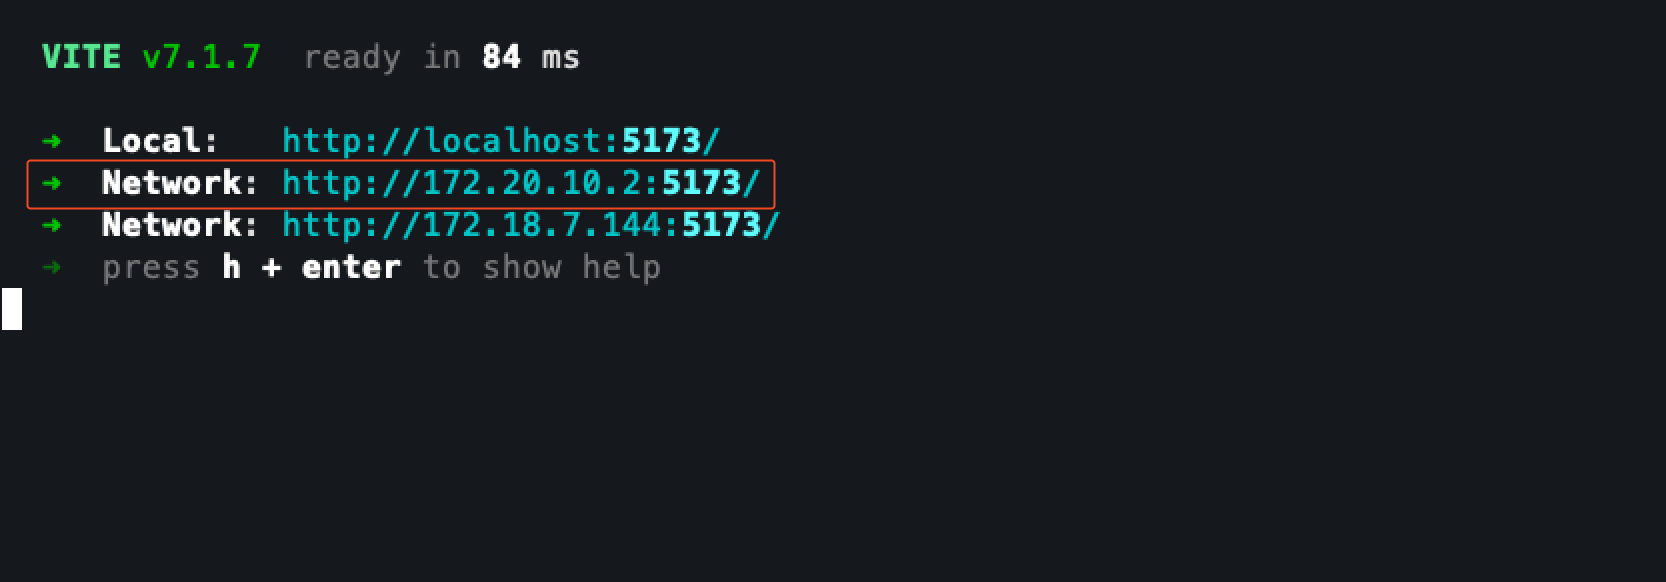
Start the frontend development server with host mode enabled:
npm run dev -- --host
This will start the development server and expose it on your network. Copy the IP address that is not the loopback address (127.0.0.1). This is the URL you will use in the Super Qi Console.
Super Qi Console Configuration
Now that both the backend and frontend are running, you need to update the Miniapp URL in the Super Qi Console and release a new version.
Step 1: Navigate to Your Miniapp
Log into Super Qi Console and navigate to your Miniapp.
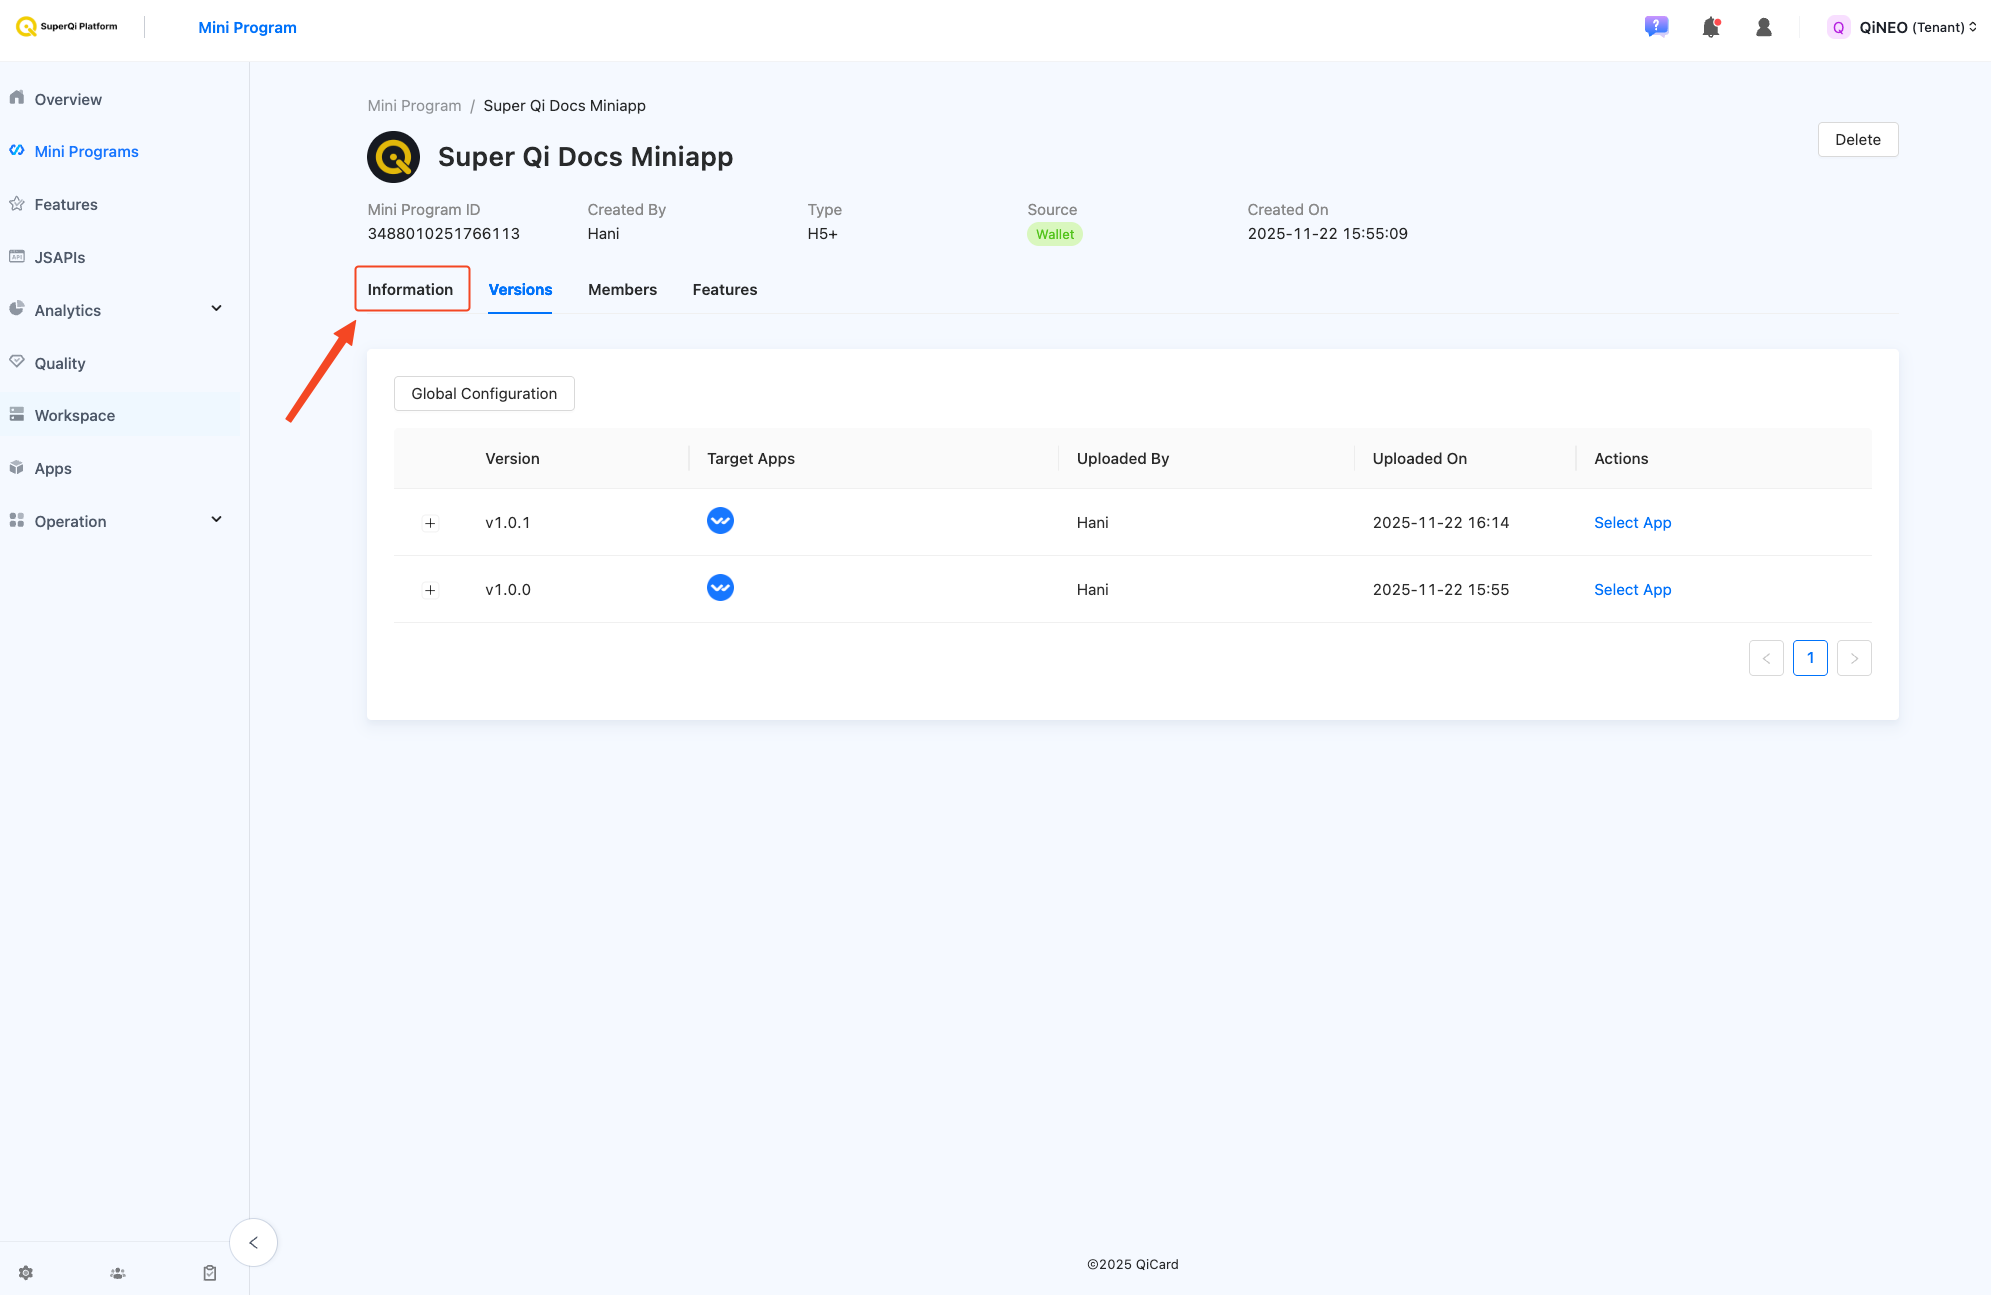
Step 2: Go to Information
Click on Information to view your Miniapp details.
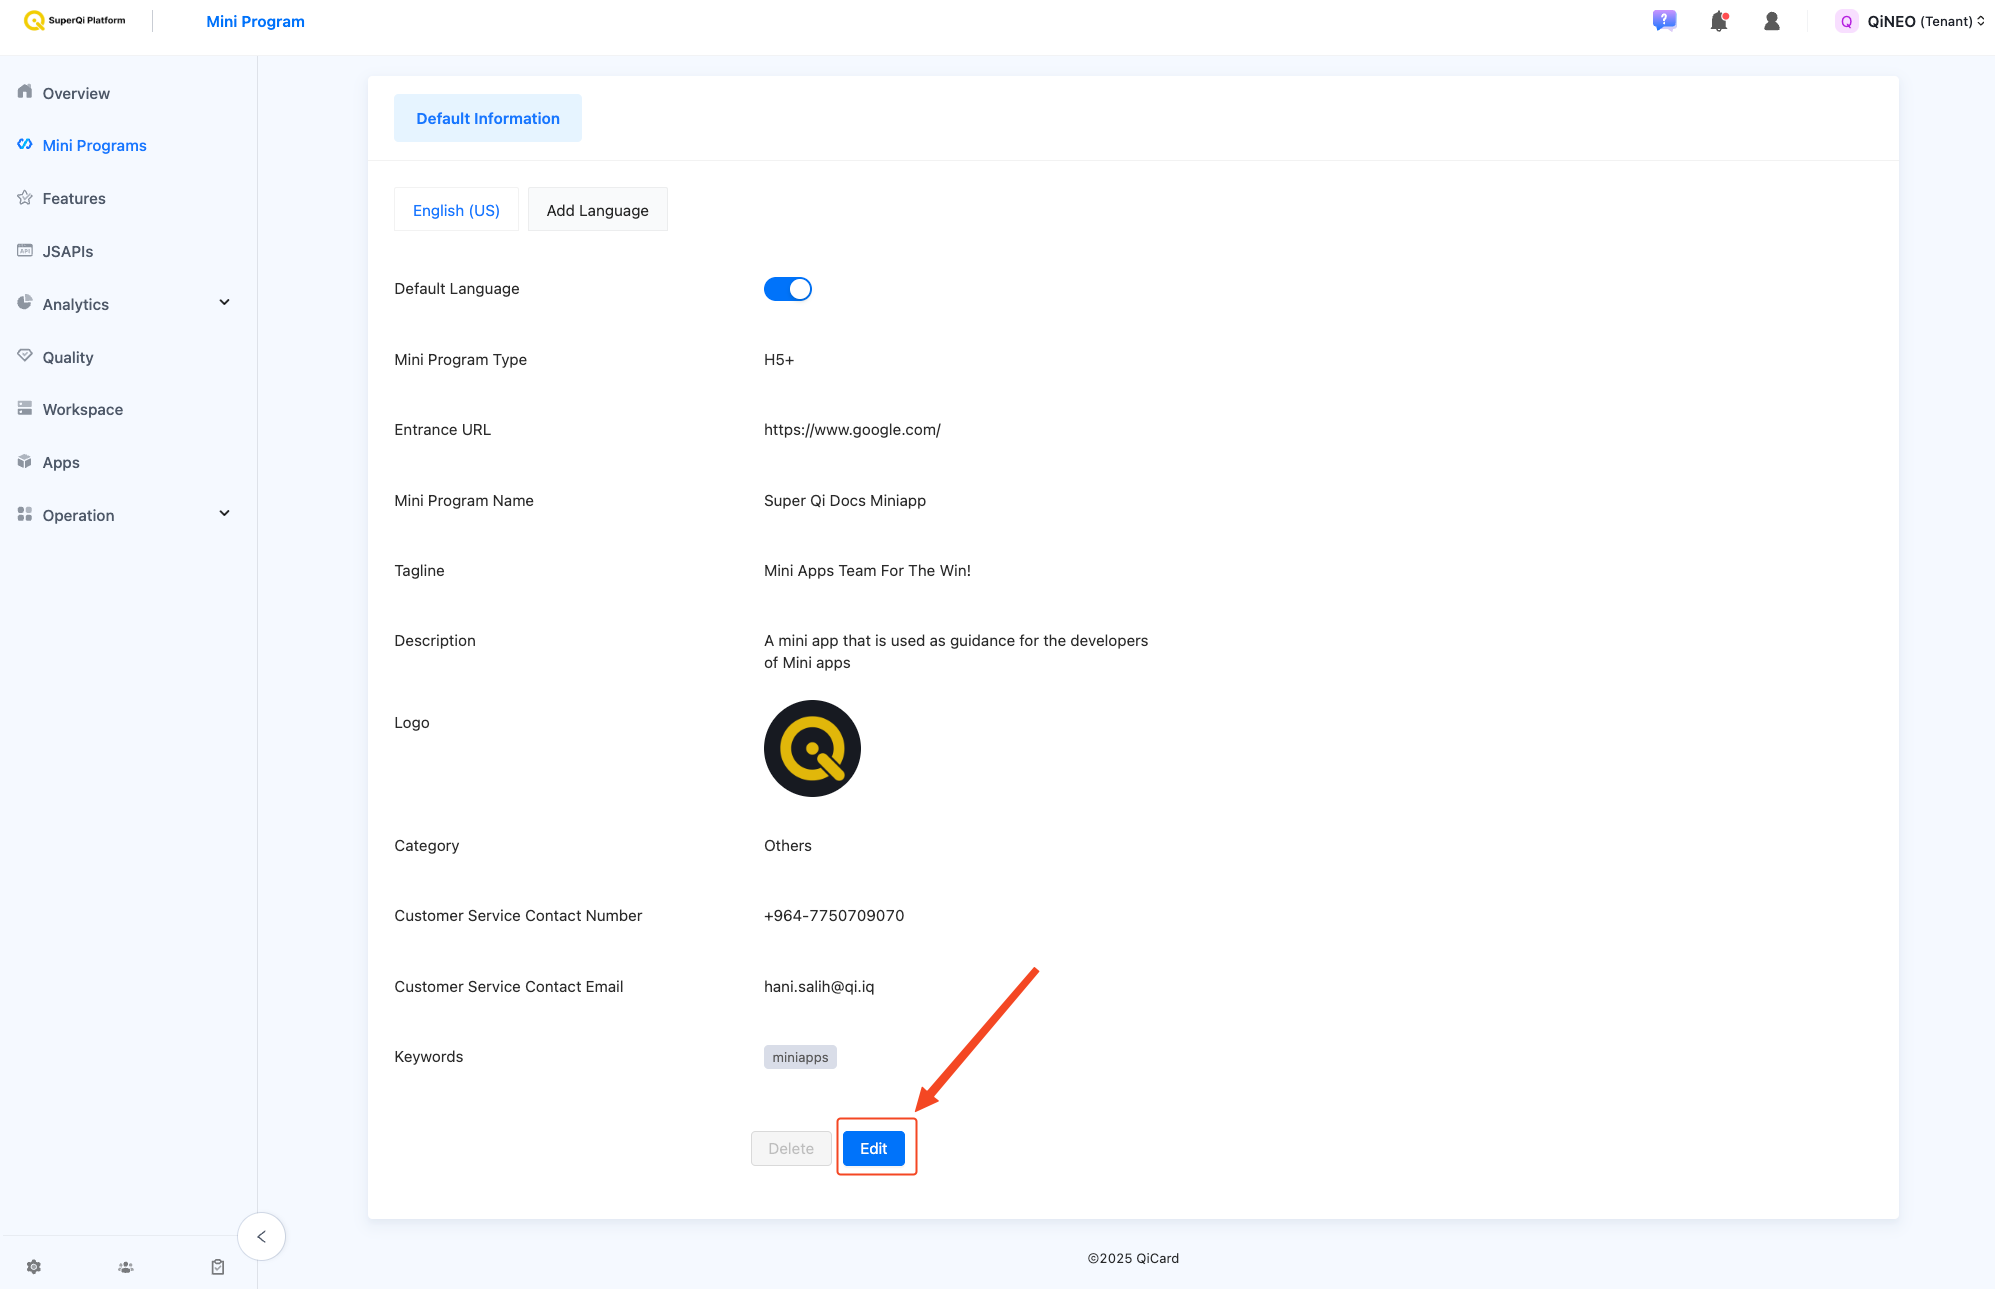
Step 3: Edit Information
Click on Edit to modify your Miniapp information.
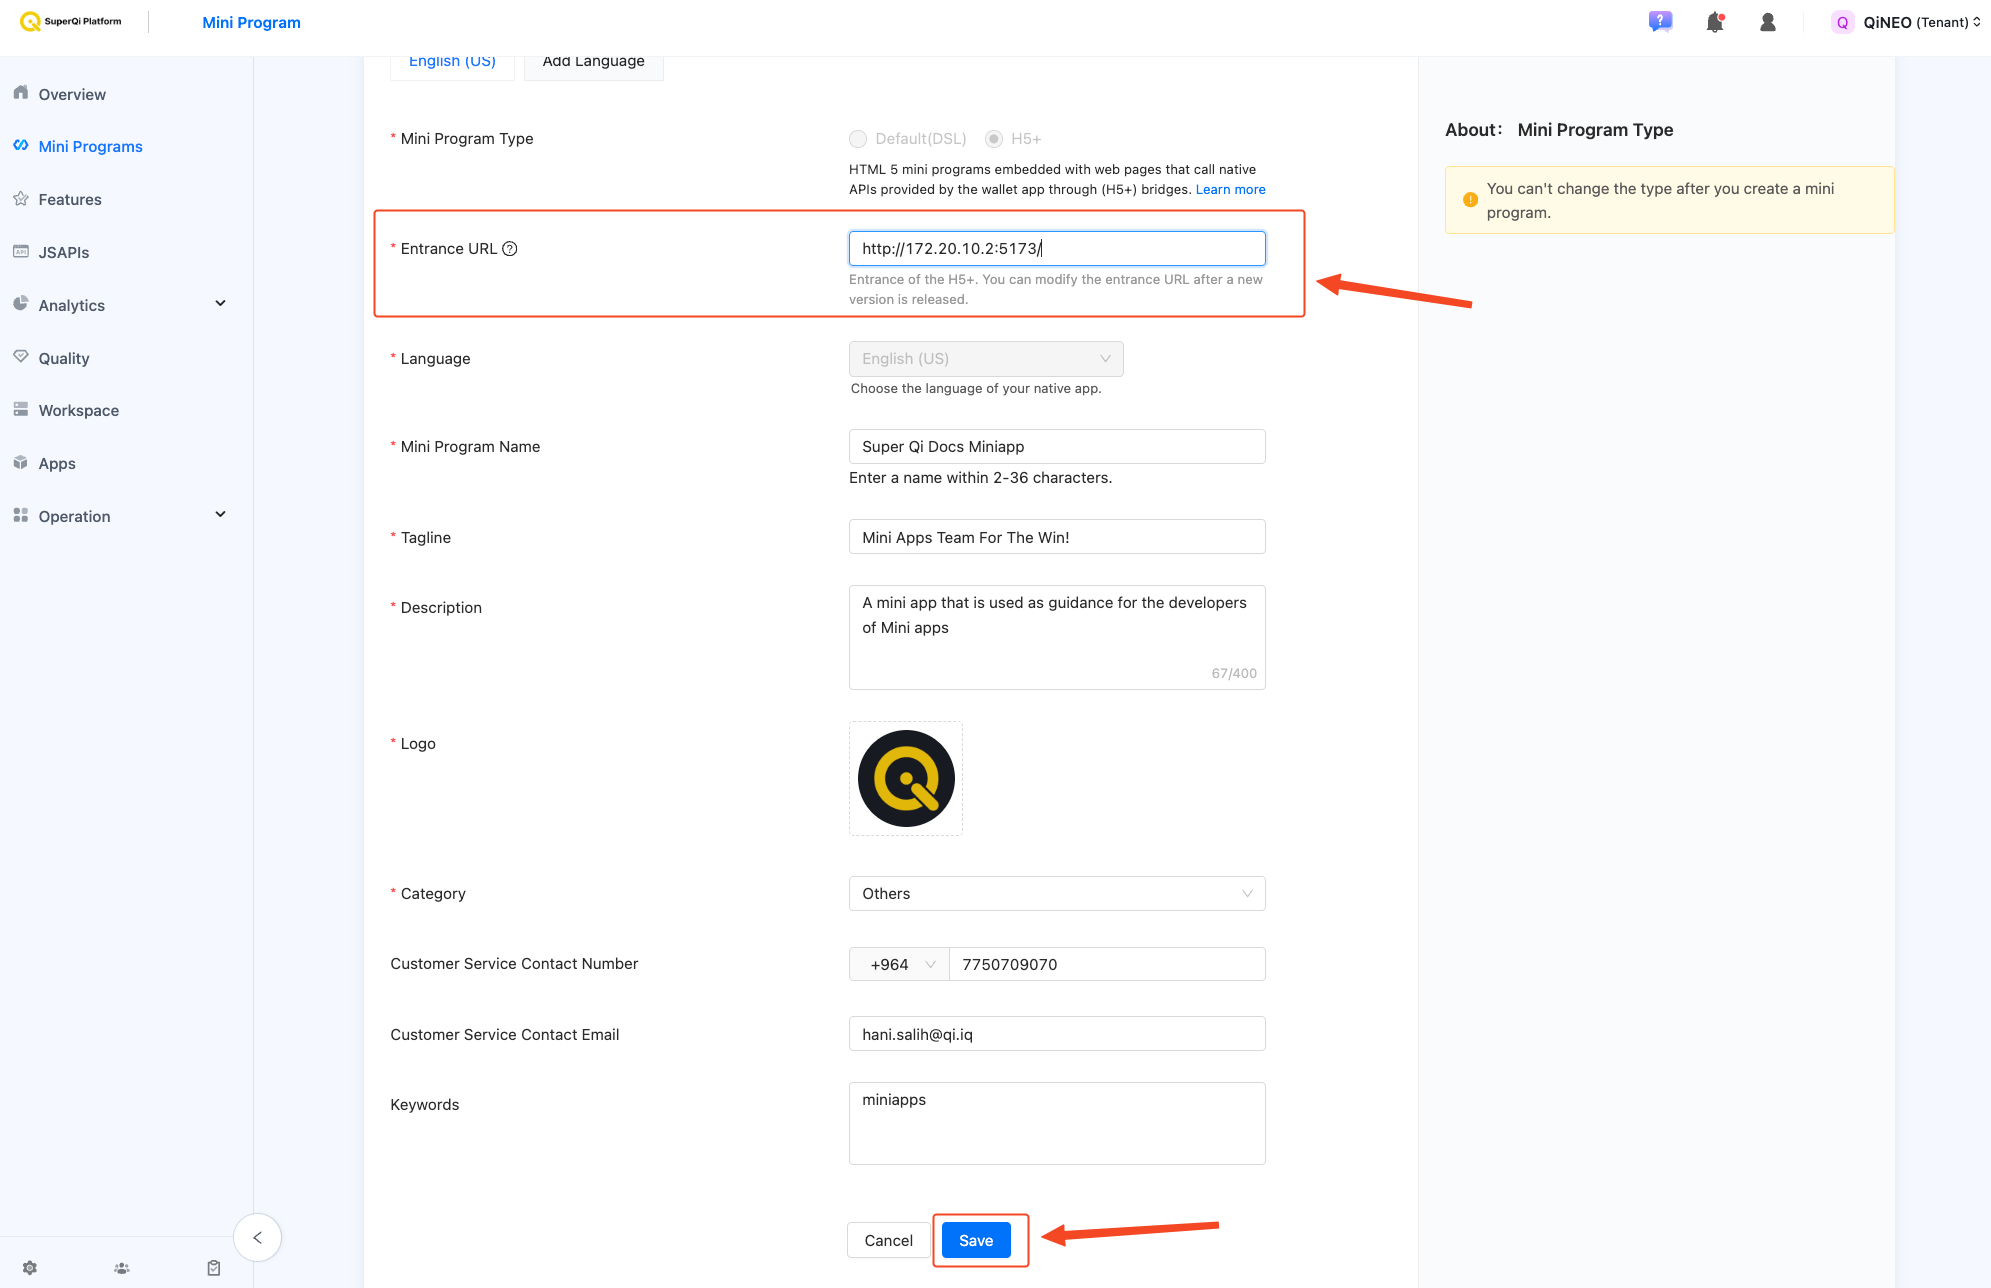
Step 4: Update the URL
Update the Miniapp URL with the IP address you copied from the frontend development server. Click Save to save your changes.
Step 5: Release a New Version
After saving the new URL, you need to release a new version of your Miniapp for the changes to take effect.
Step 6: Get the QR code
Click on the "Temporary Testing QR Code" for the QR code to appear, and now the Demo Miniapp is ready to be explored!
Super Qi UAT
Now it's time to see your Demo Miniapp in action!
Step 1: Open Super Qi UAT
Open the Super Qi UAT application on your phone.
Step 2: Scan the QR Code
Use the scan feature to scan the QR code displayed in the Super Qi Console.
Step 3: Explore the Demo Miniapp
The Super Qi Demo Miniapp home page will open:
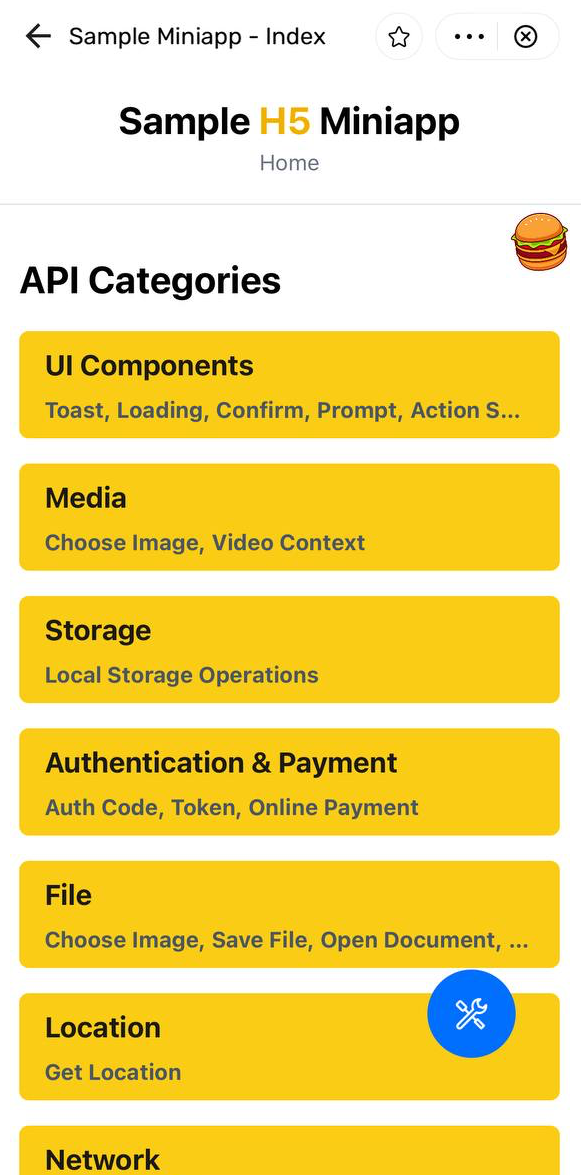
This is the Demo Miniapp! You can explore all of its features by navigating through the pages. Each functionality has its own dedicated page with a terminal that prints the results, allowing you to see exactly how the Super Qi APIs work.
Happy Exploration!
Troubleshooting
If your Miniapp doesn't load or API calls fail, work through these common issues:
| Symptom | Likely cause | Fix |
|---|---|---|
| Miniapp loads but API calls fail / time out | Phone and machine are on different networks | Connect both to the same Wi-Fi. Guest/corporate networks often isolate devices — use a shared network or a phone hotspot. |
| API calls go to the wrong place | BASE_URL still points to localhost/127.0.0.1 | Set BASE_URL in common/main.js to your machine's network IP (e.g. http://192.168.1.100:8080), not loopback. |
| Connection refused | Backend isn't running, or the port in BASE_URL doesn't match the backend's port | Keep the backend terminal running, and make sure the port in BASE_URL matches the port the backend prints on startup. |
| Phone can't reach the backend at all | Your machine's firewall is blocking incoming connections | Allow incoming connections on the backend port, or temporarily disable the firewall while testing. |
| Frontend URL not reachable from phone | Frontend wasn't started in host mode | Restart with npm run dev -- --host. |
| IP stopped working after a while | Machine got a new IP via DHCP, or a VPN changed it | Re-run the IP lookup, update BASE_URL, and disable any VPN during local testing. |
| Miniapp opens but shows the wrong or old build | The scanned Miniapp is set to the Prod environment, not Testing | In Super Qi UAT, make sure you scan the Miniapp that is in the Testing environment, not the Prod environment. |
| Changes don't appear after updating the URL | New version wasn't released in the Console | Release a new version after editing the Miniapp URL, then regenerate the testing QR code. |
Still stuck? See the FAQ or contact the Miniapps team.
Ready to continue? The next section will guide you through exploring the code.