
Configure & Test Miniapp
Overview
In this section, we will configure your Miniapp credentials and set it to the UAT environment so you can test it in the Super Qi UAT app. Follow the steps below to generate a QR code that will display your first Miniapp.
As you will notice later, Miniapps consist of versions. You can add UAT, Production, or any other environment to each version. For now, we will be creating the UAT environment for the versions. Later on, in the last section of the Developer's Guide (Releasing to Production), we will create a Production environment for that specific version.
Configuring Your Miniapp
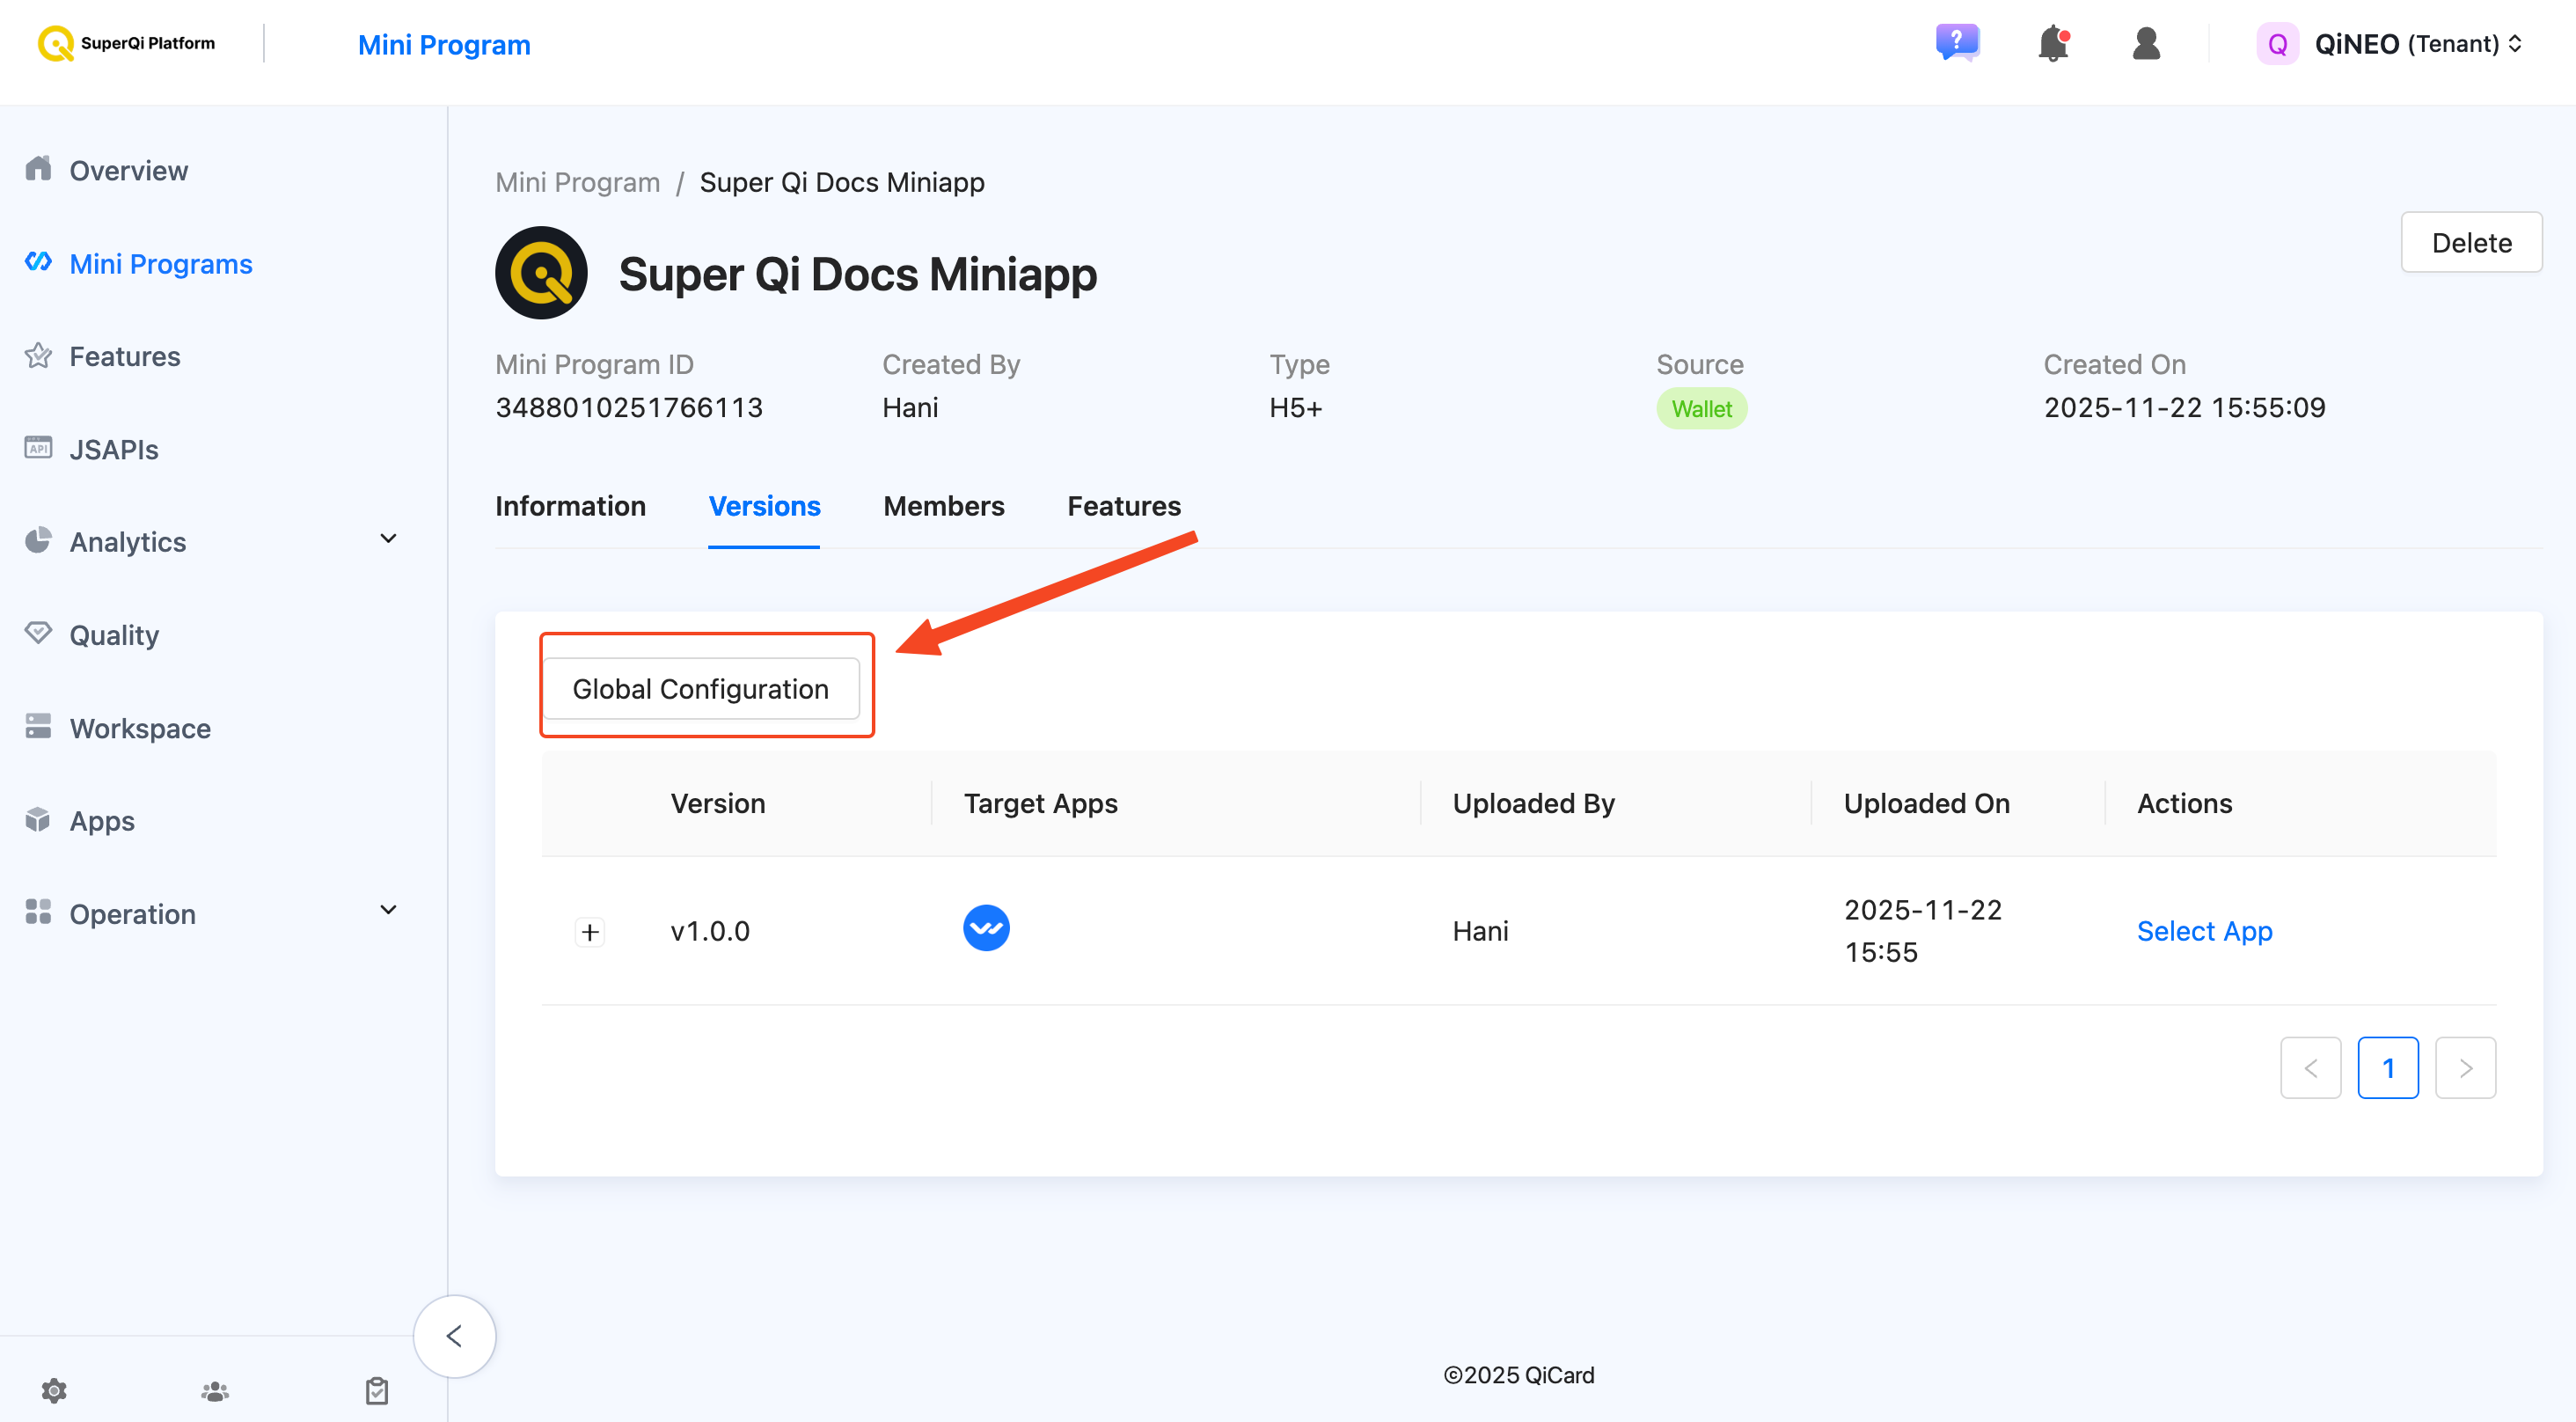
Step 1: Open Global Configuration
Navigate to your Miniapp and click on Global Configuration to configure your Miniapp settings.
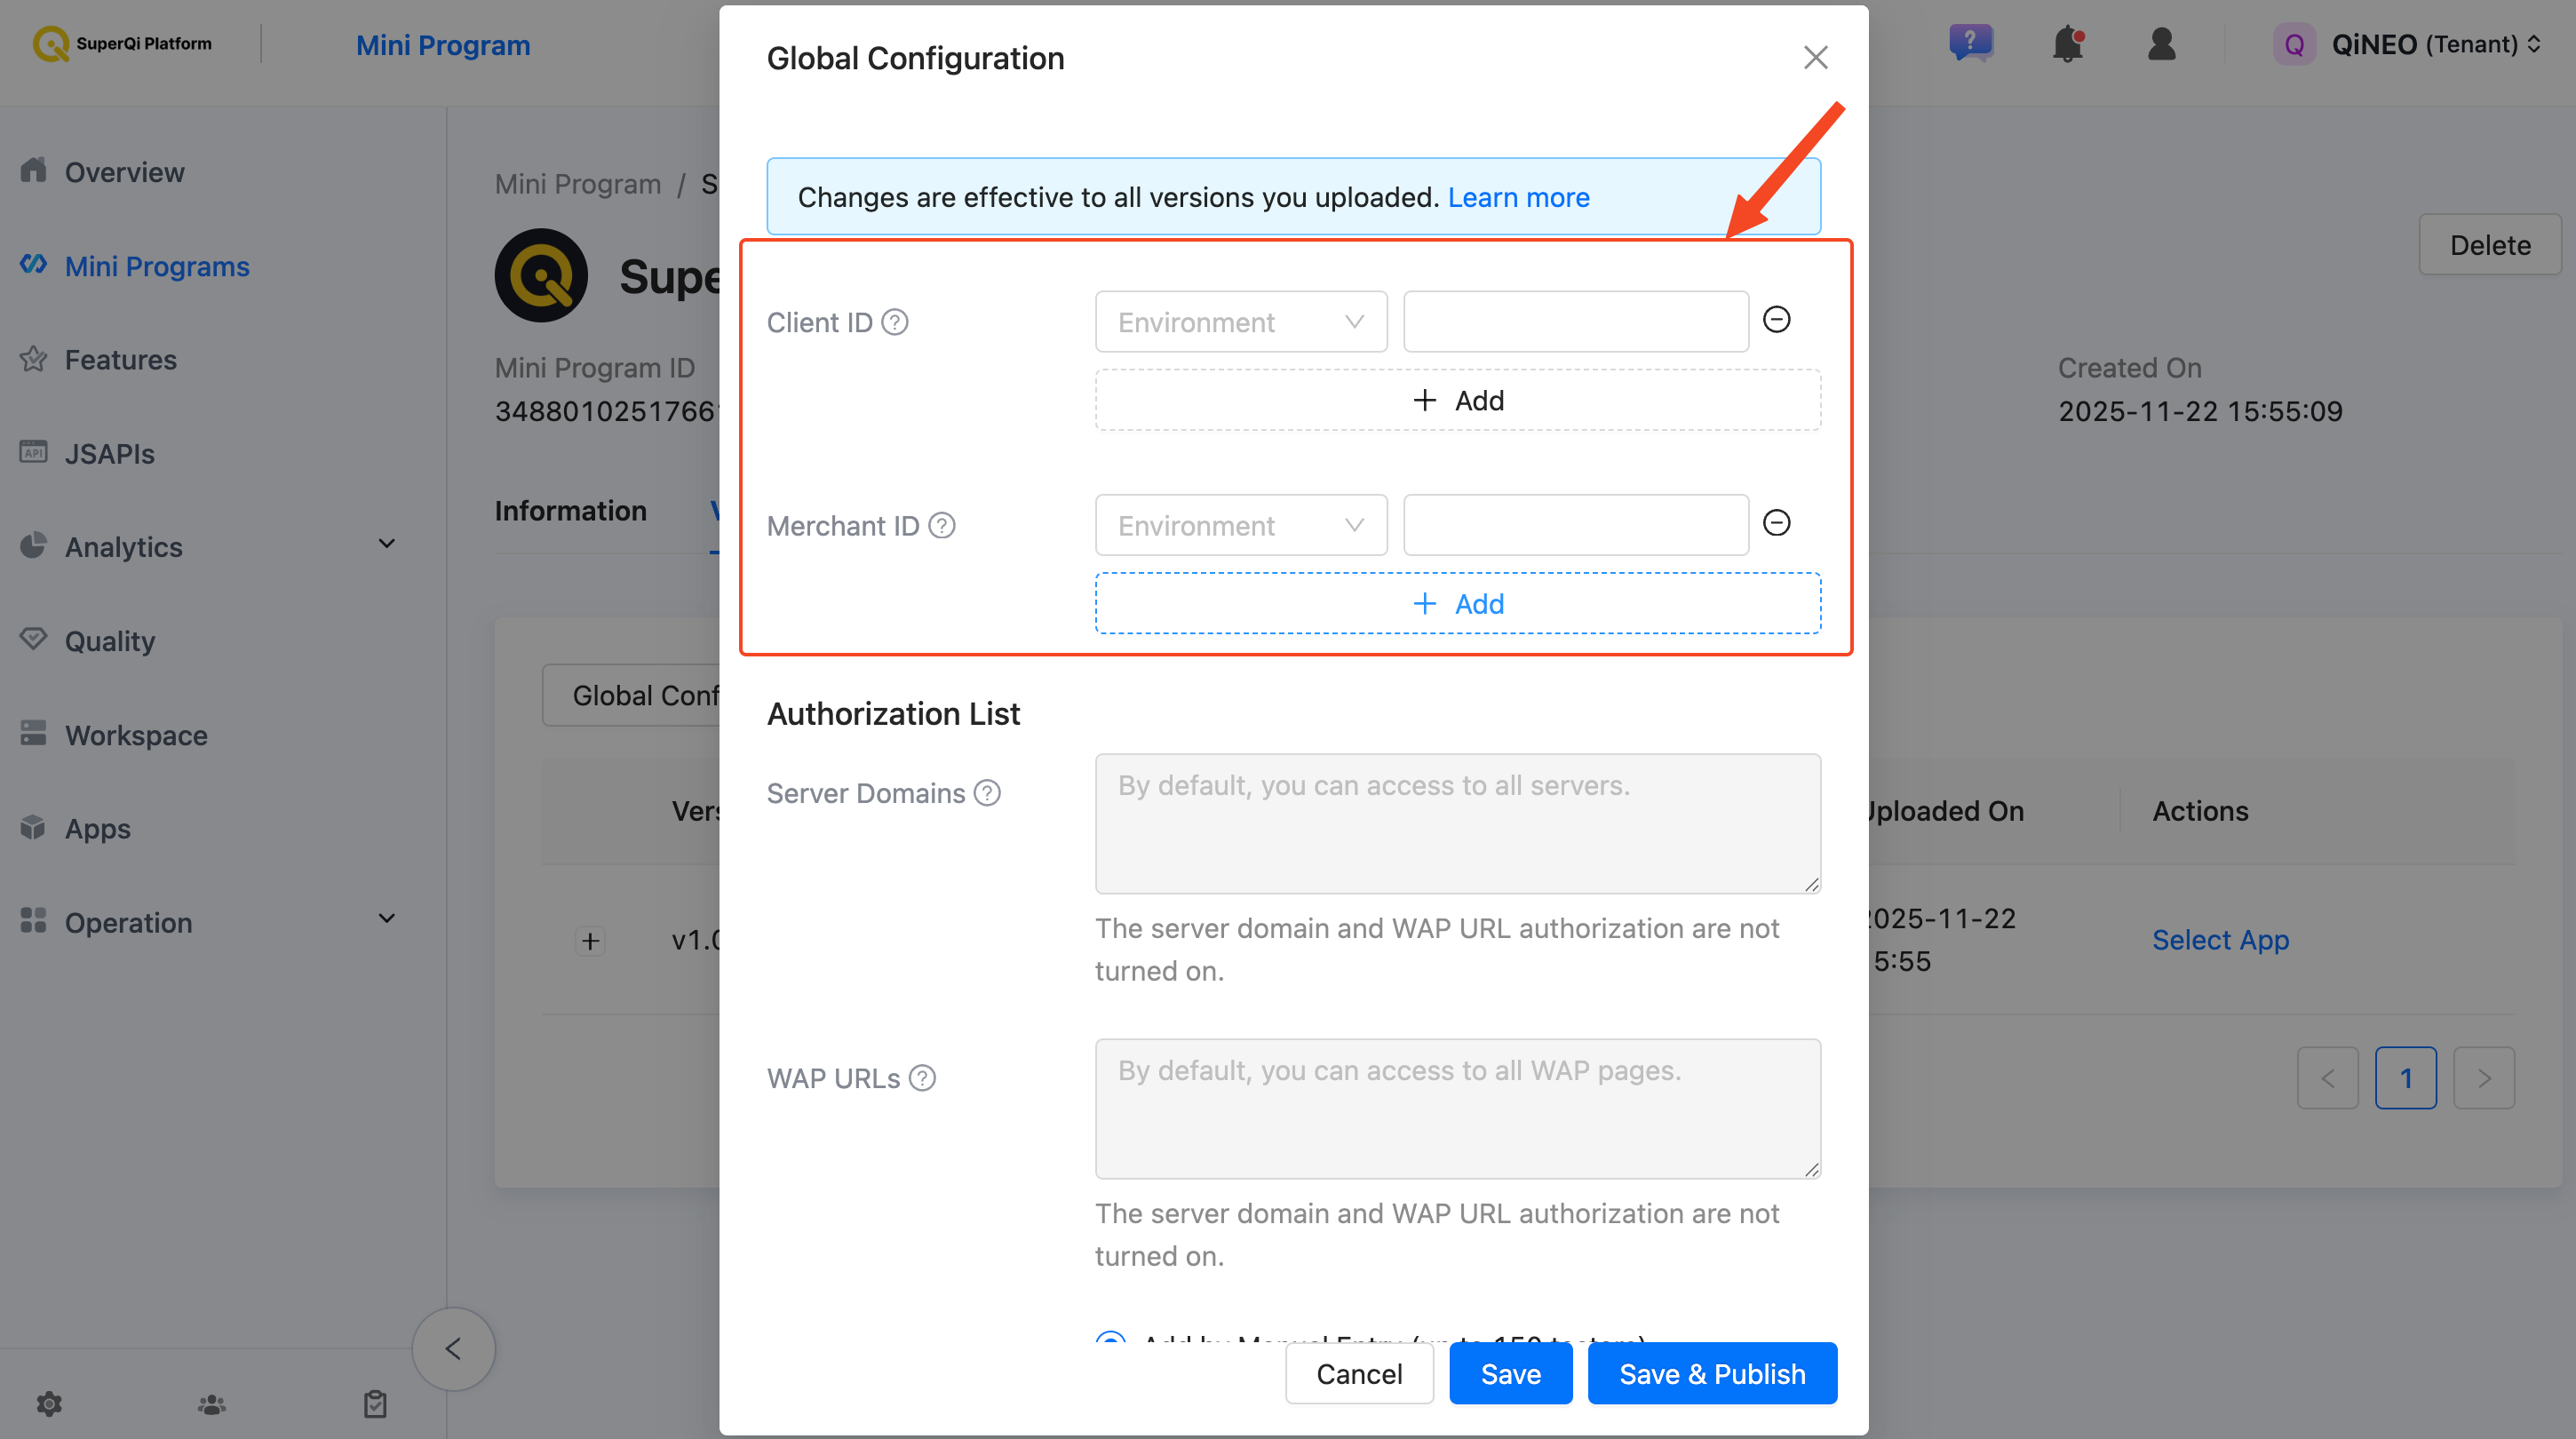
Step 2: Set Environment and Credentials
In the configuration panel:
- Select Test as the environment for both the Client ID and Merchant ID
- Enter your Client ID
- Enter your Merchant ID
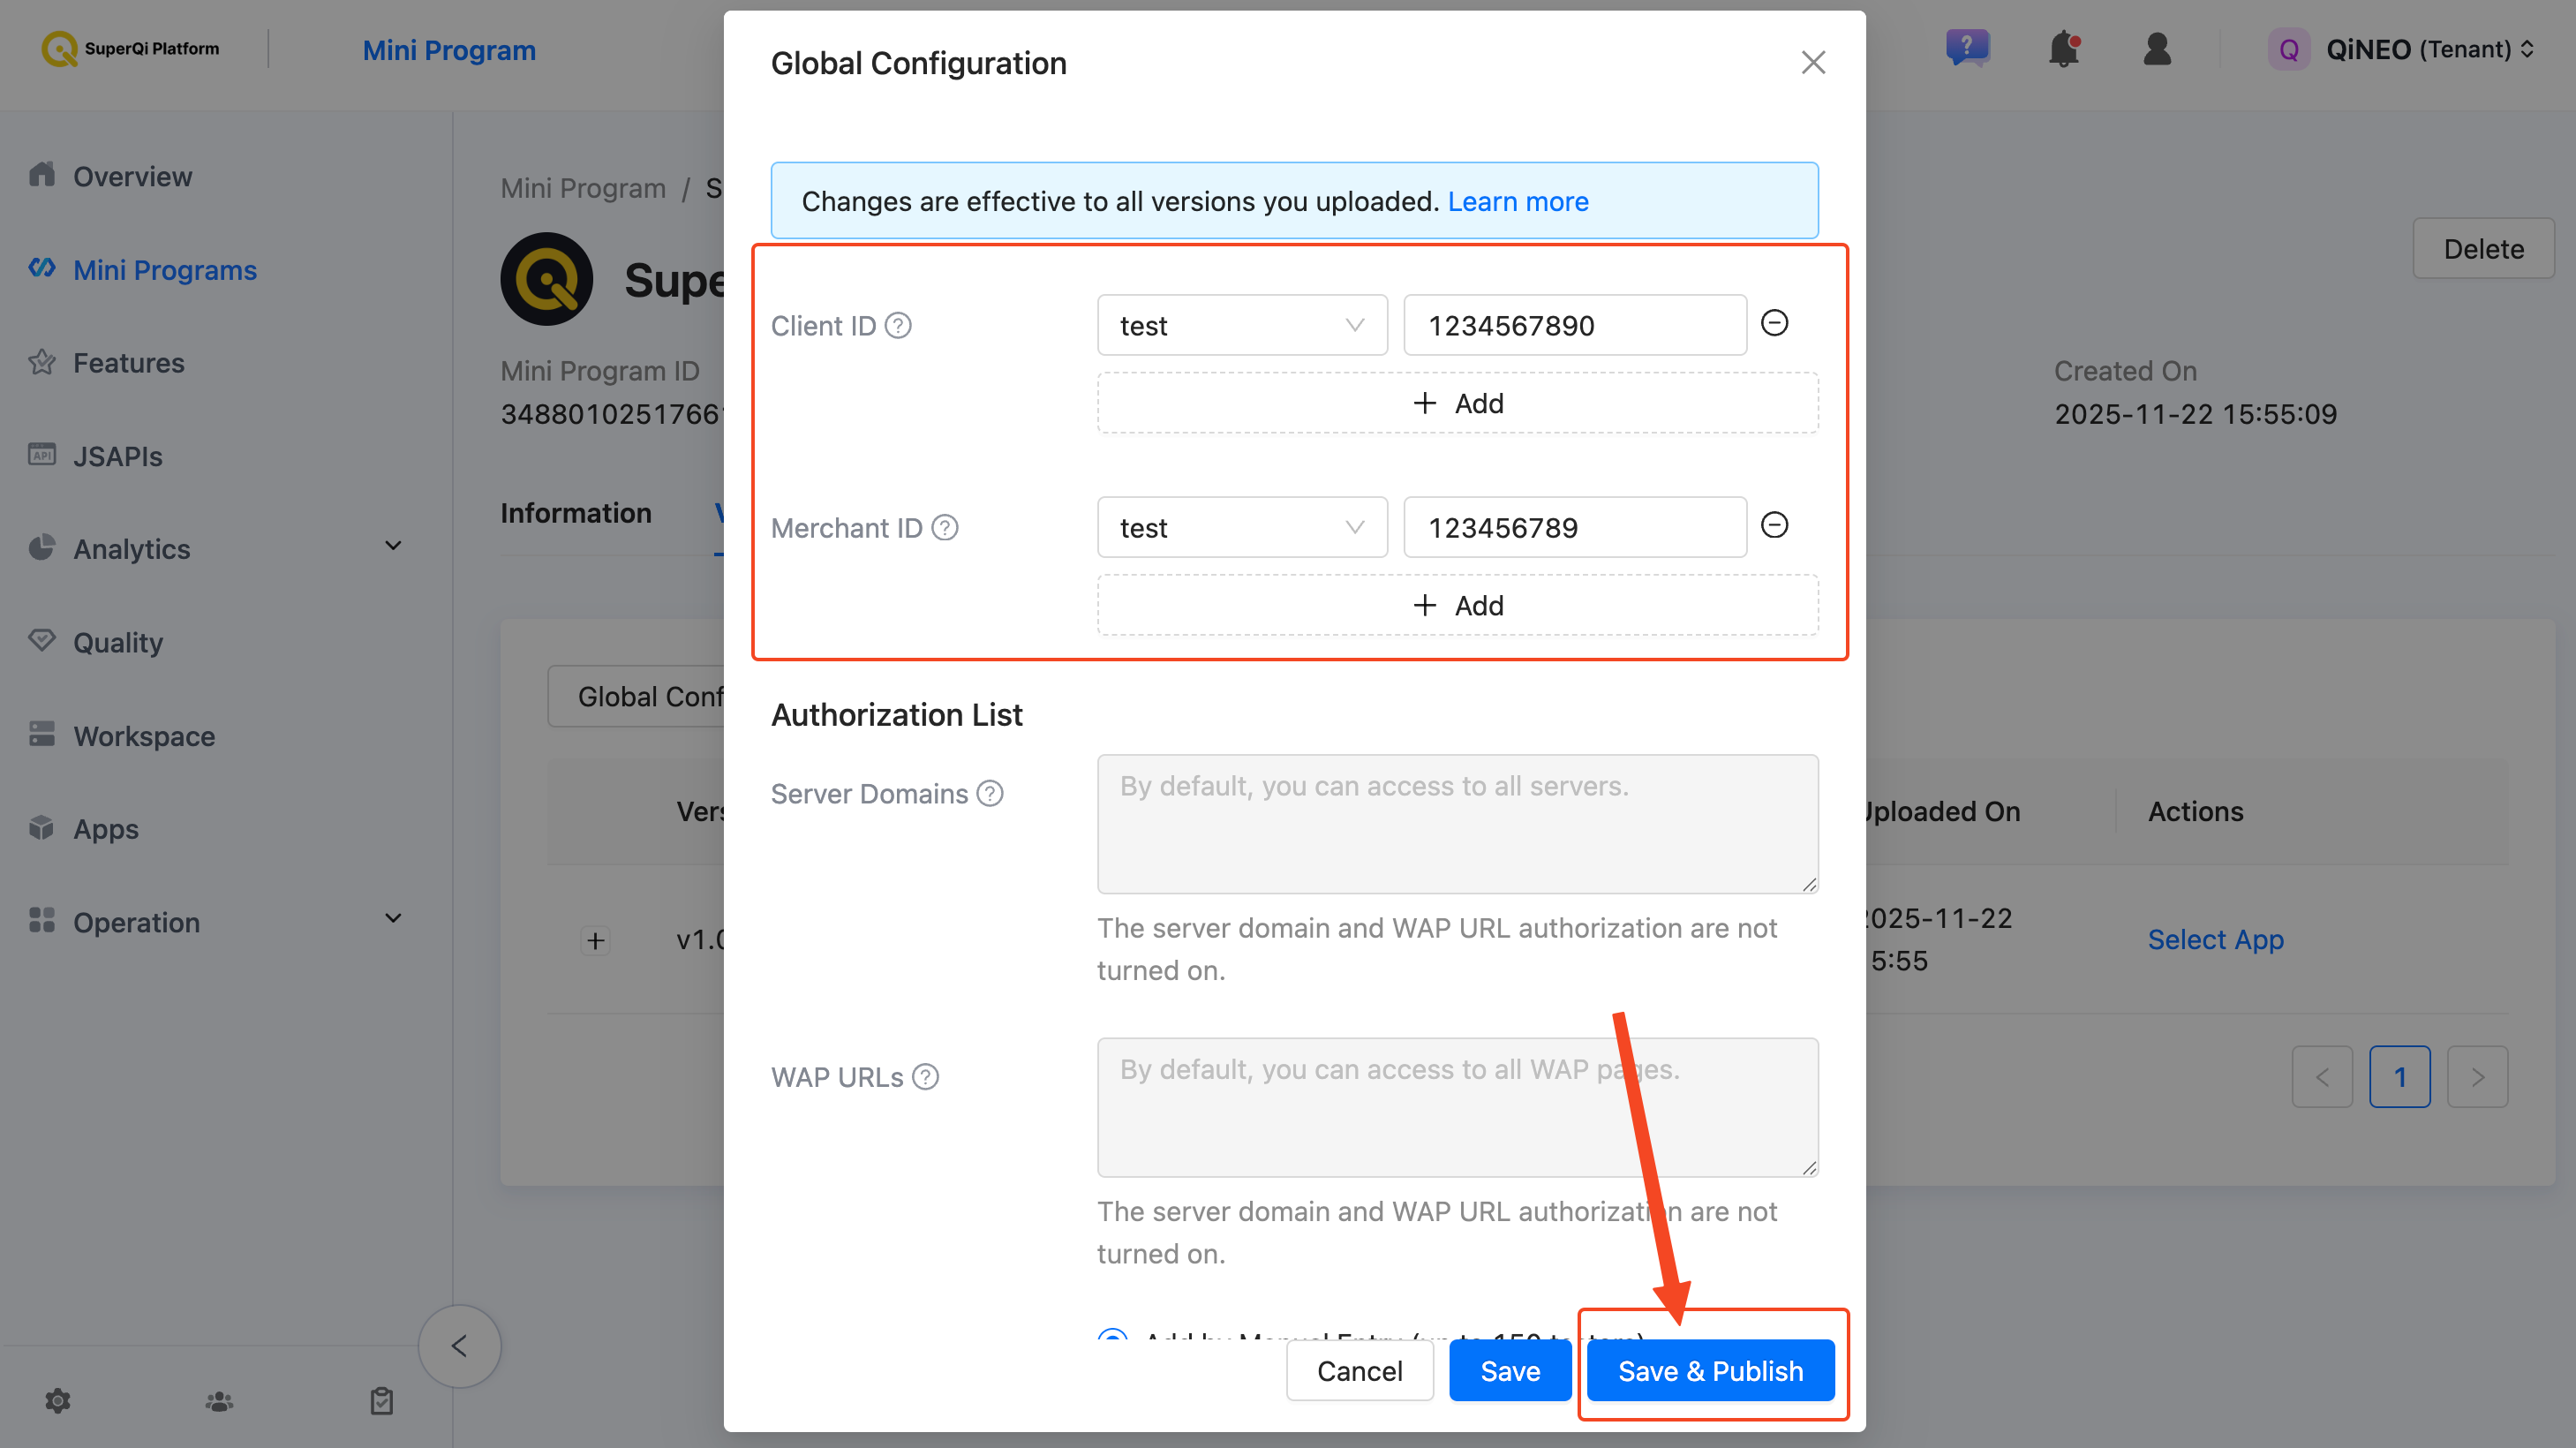
Step 3: Save and Publish
After entering your Client ID and Merchant ID, click on Save & Publish.
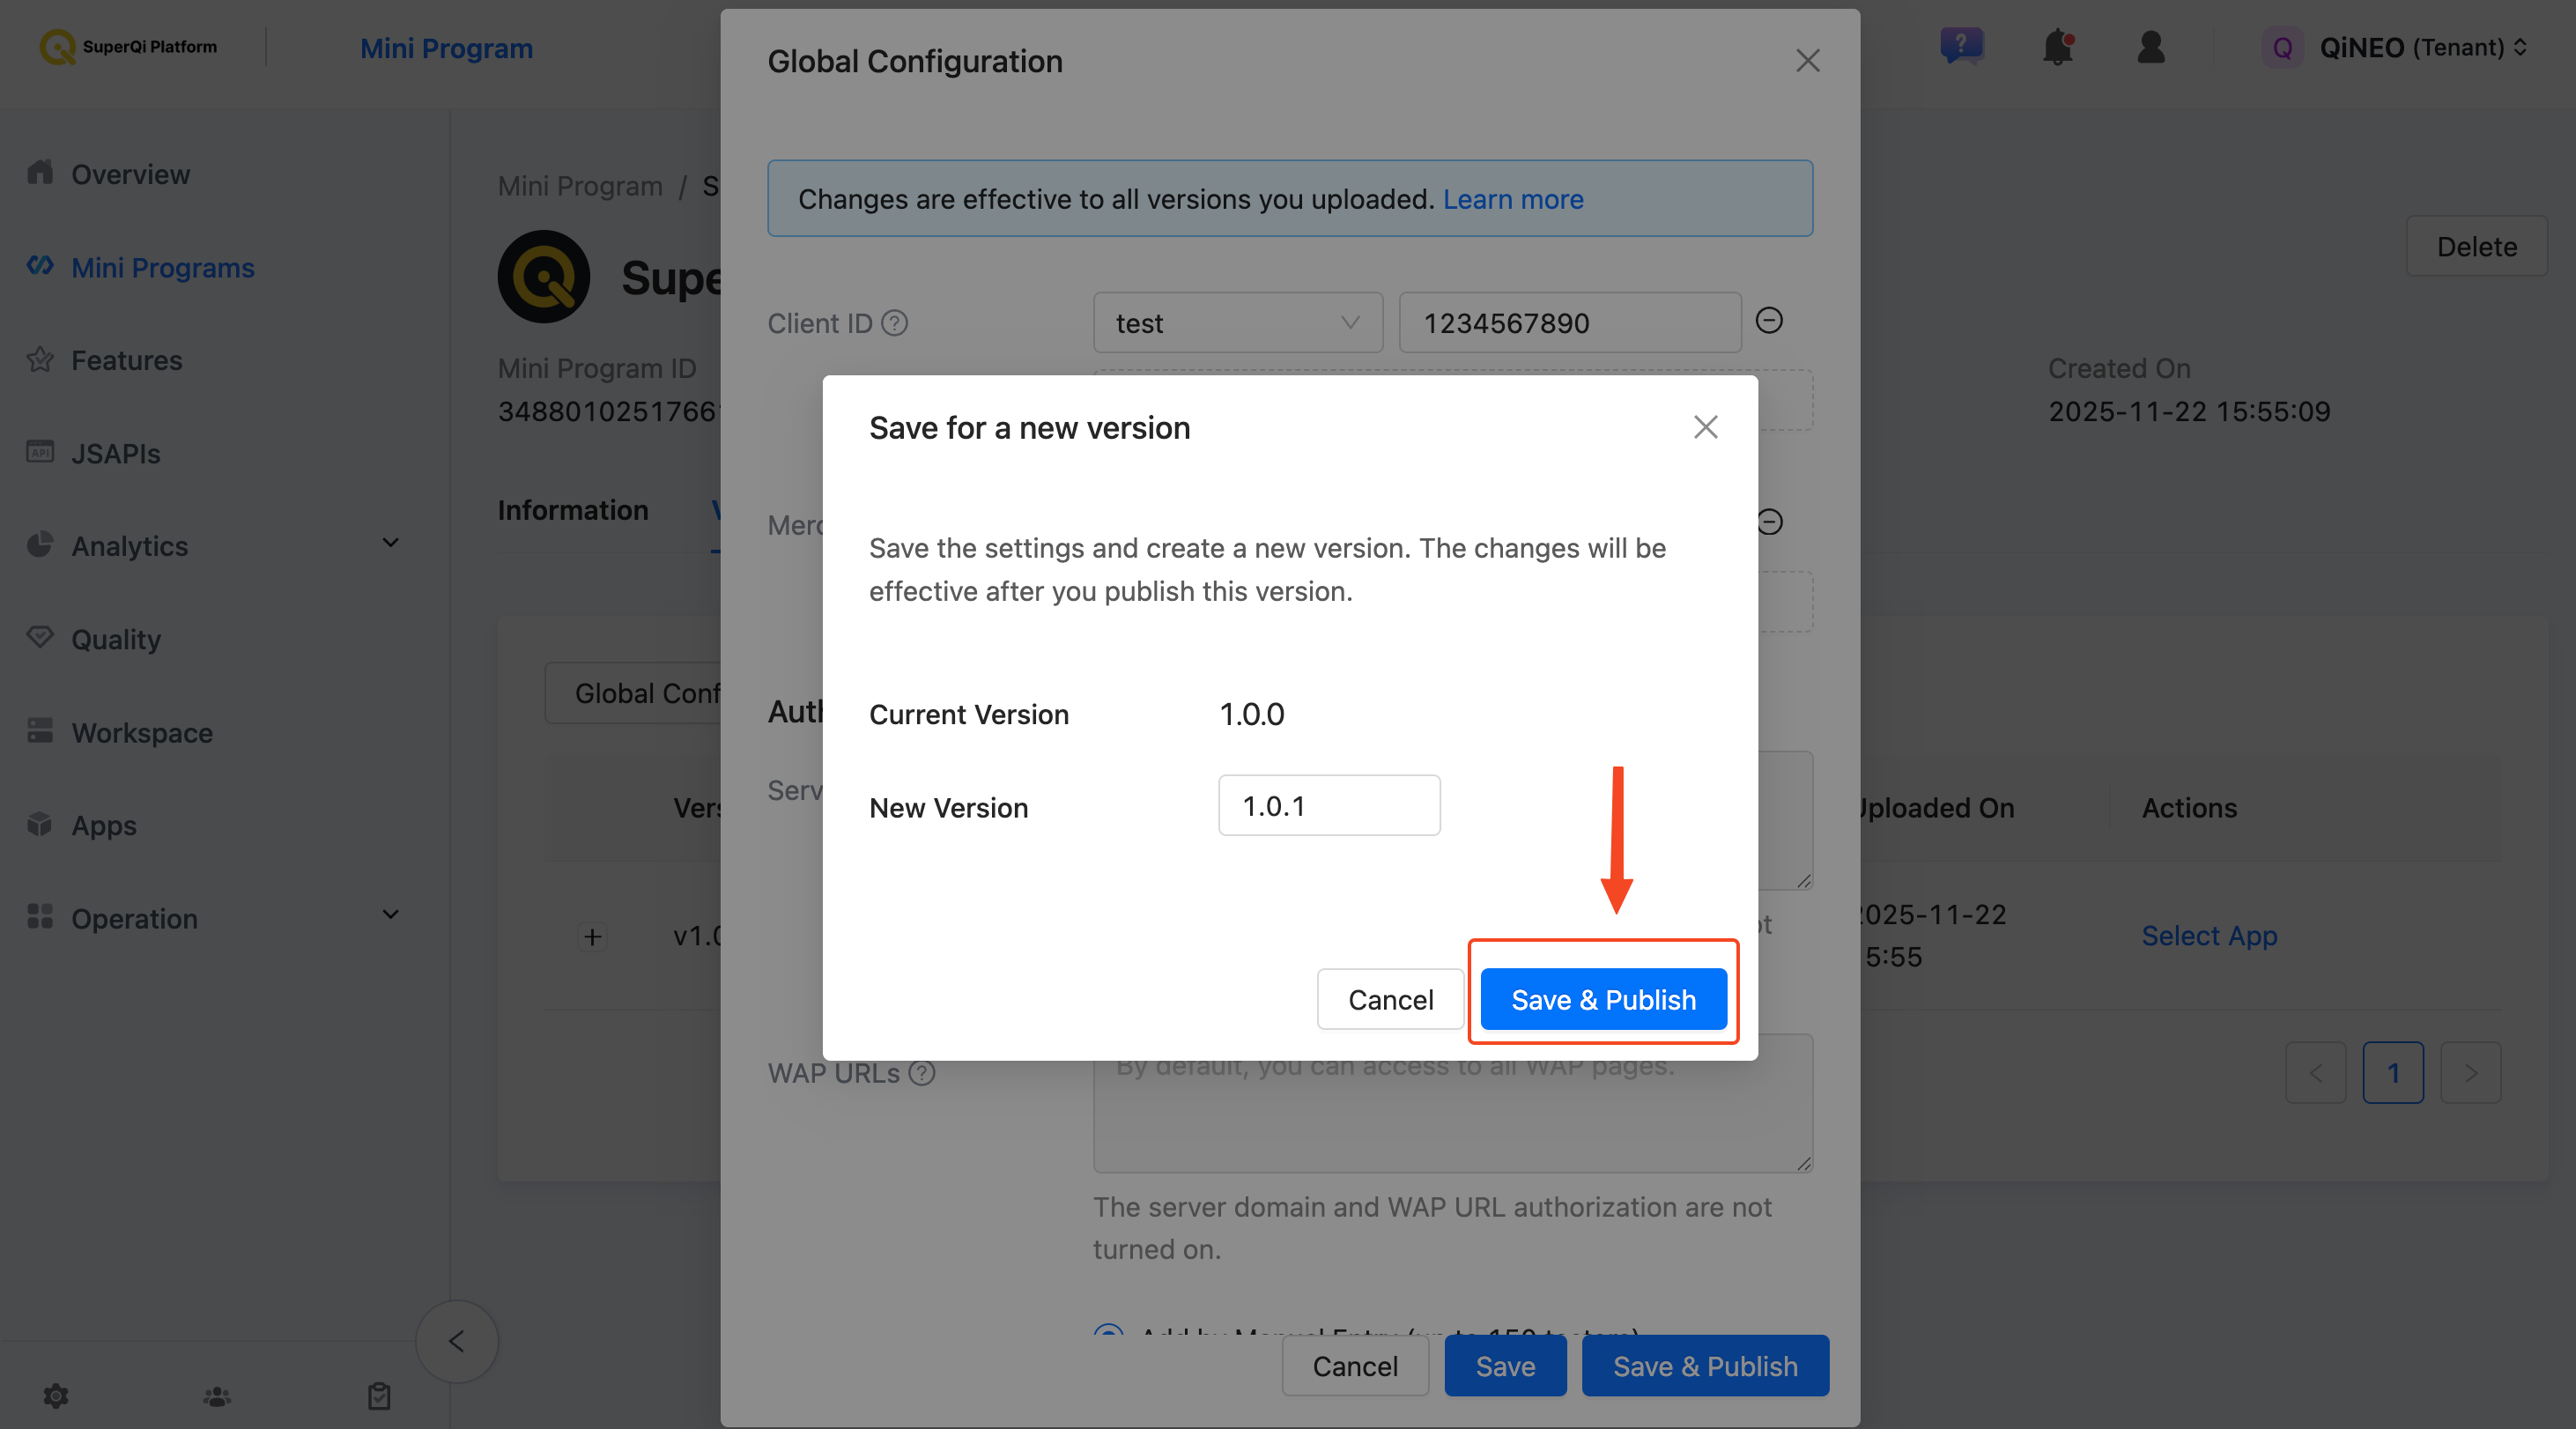
Step 4: Confirm Version
You will be prompted to confirm the version. Click on Save & Publish again to confirm.
Step 5: Navigate Back to Miniapp
After publishing, you will be redirected to that version. However, this is set to the Production environment by default, which is not what we want for testing. Navigate back to your Miniapp dashboard.
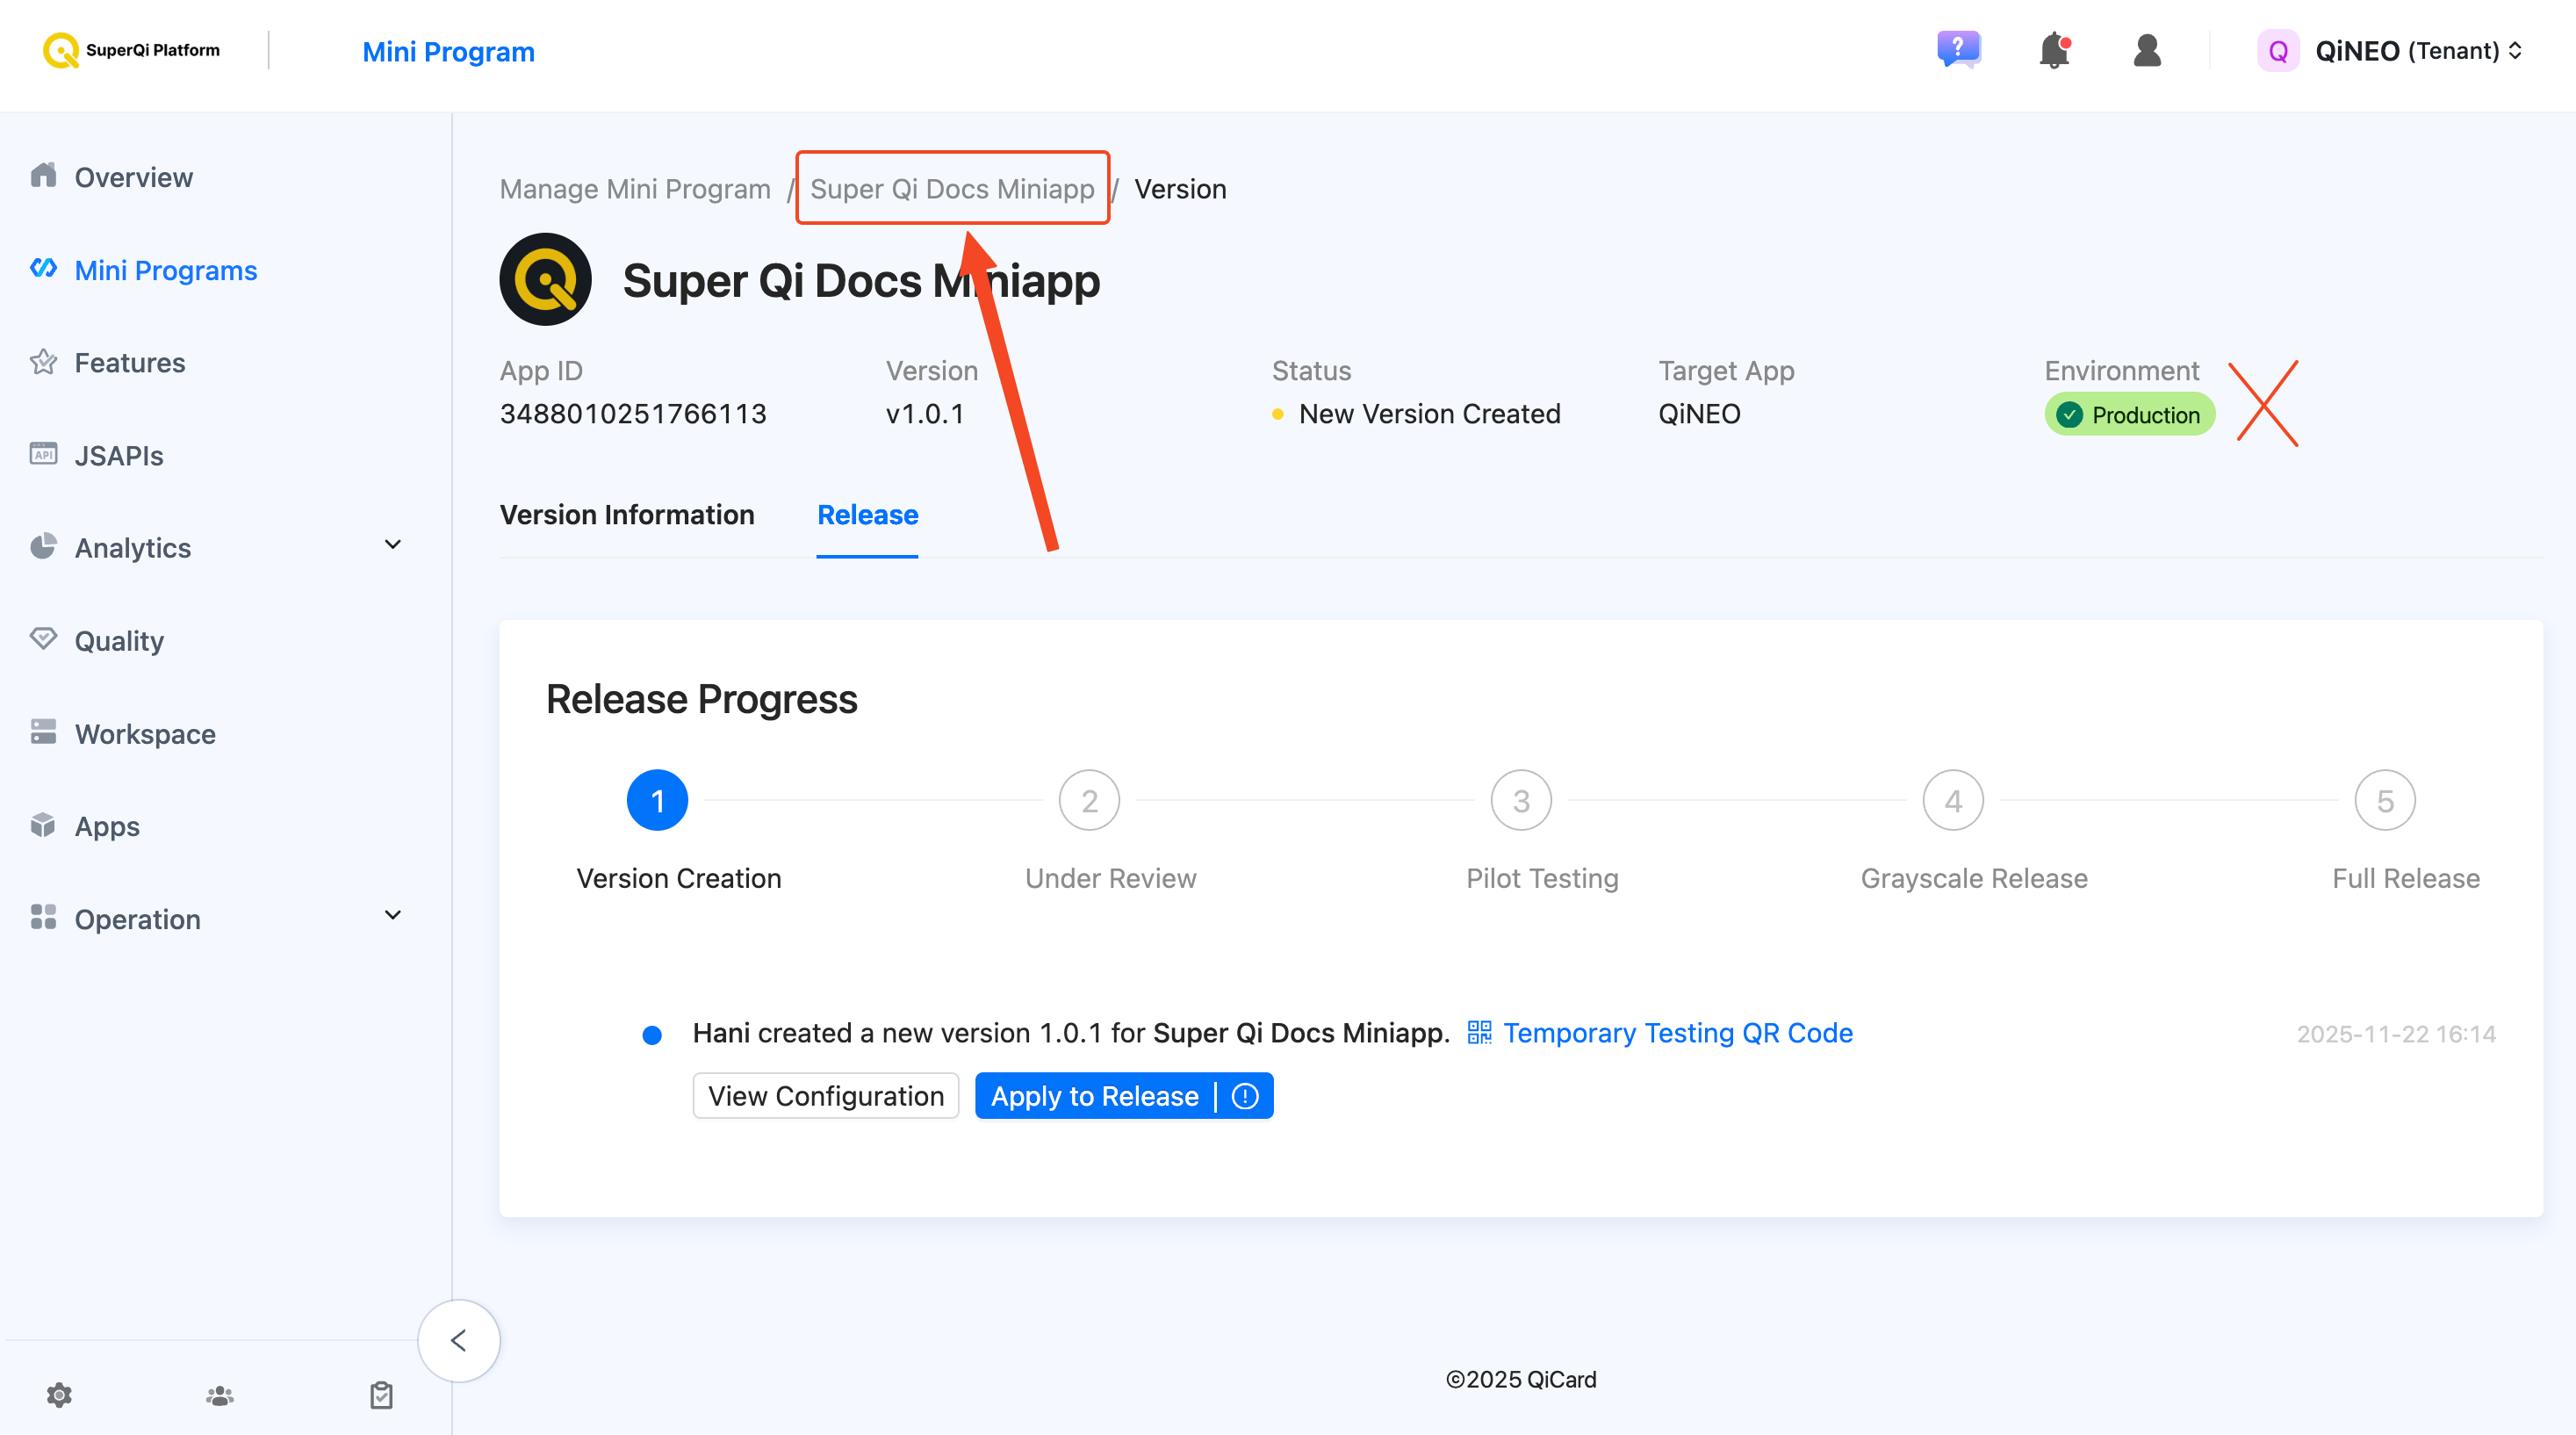
Step 6: Select App Version
Back in your Miniapp dashboard, go to the Versions tab. Click on Select app for the latest version you have created.
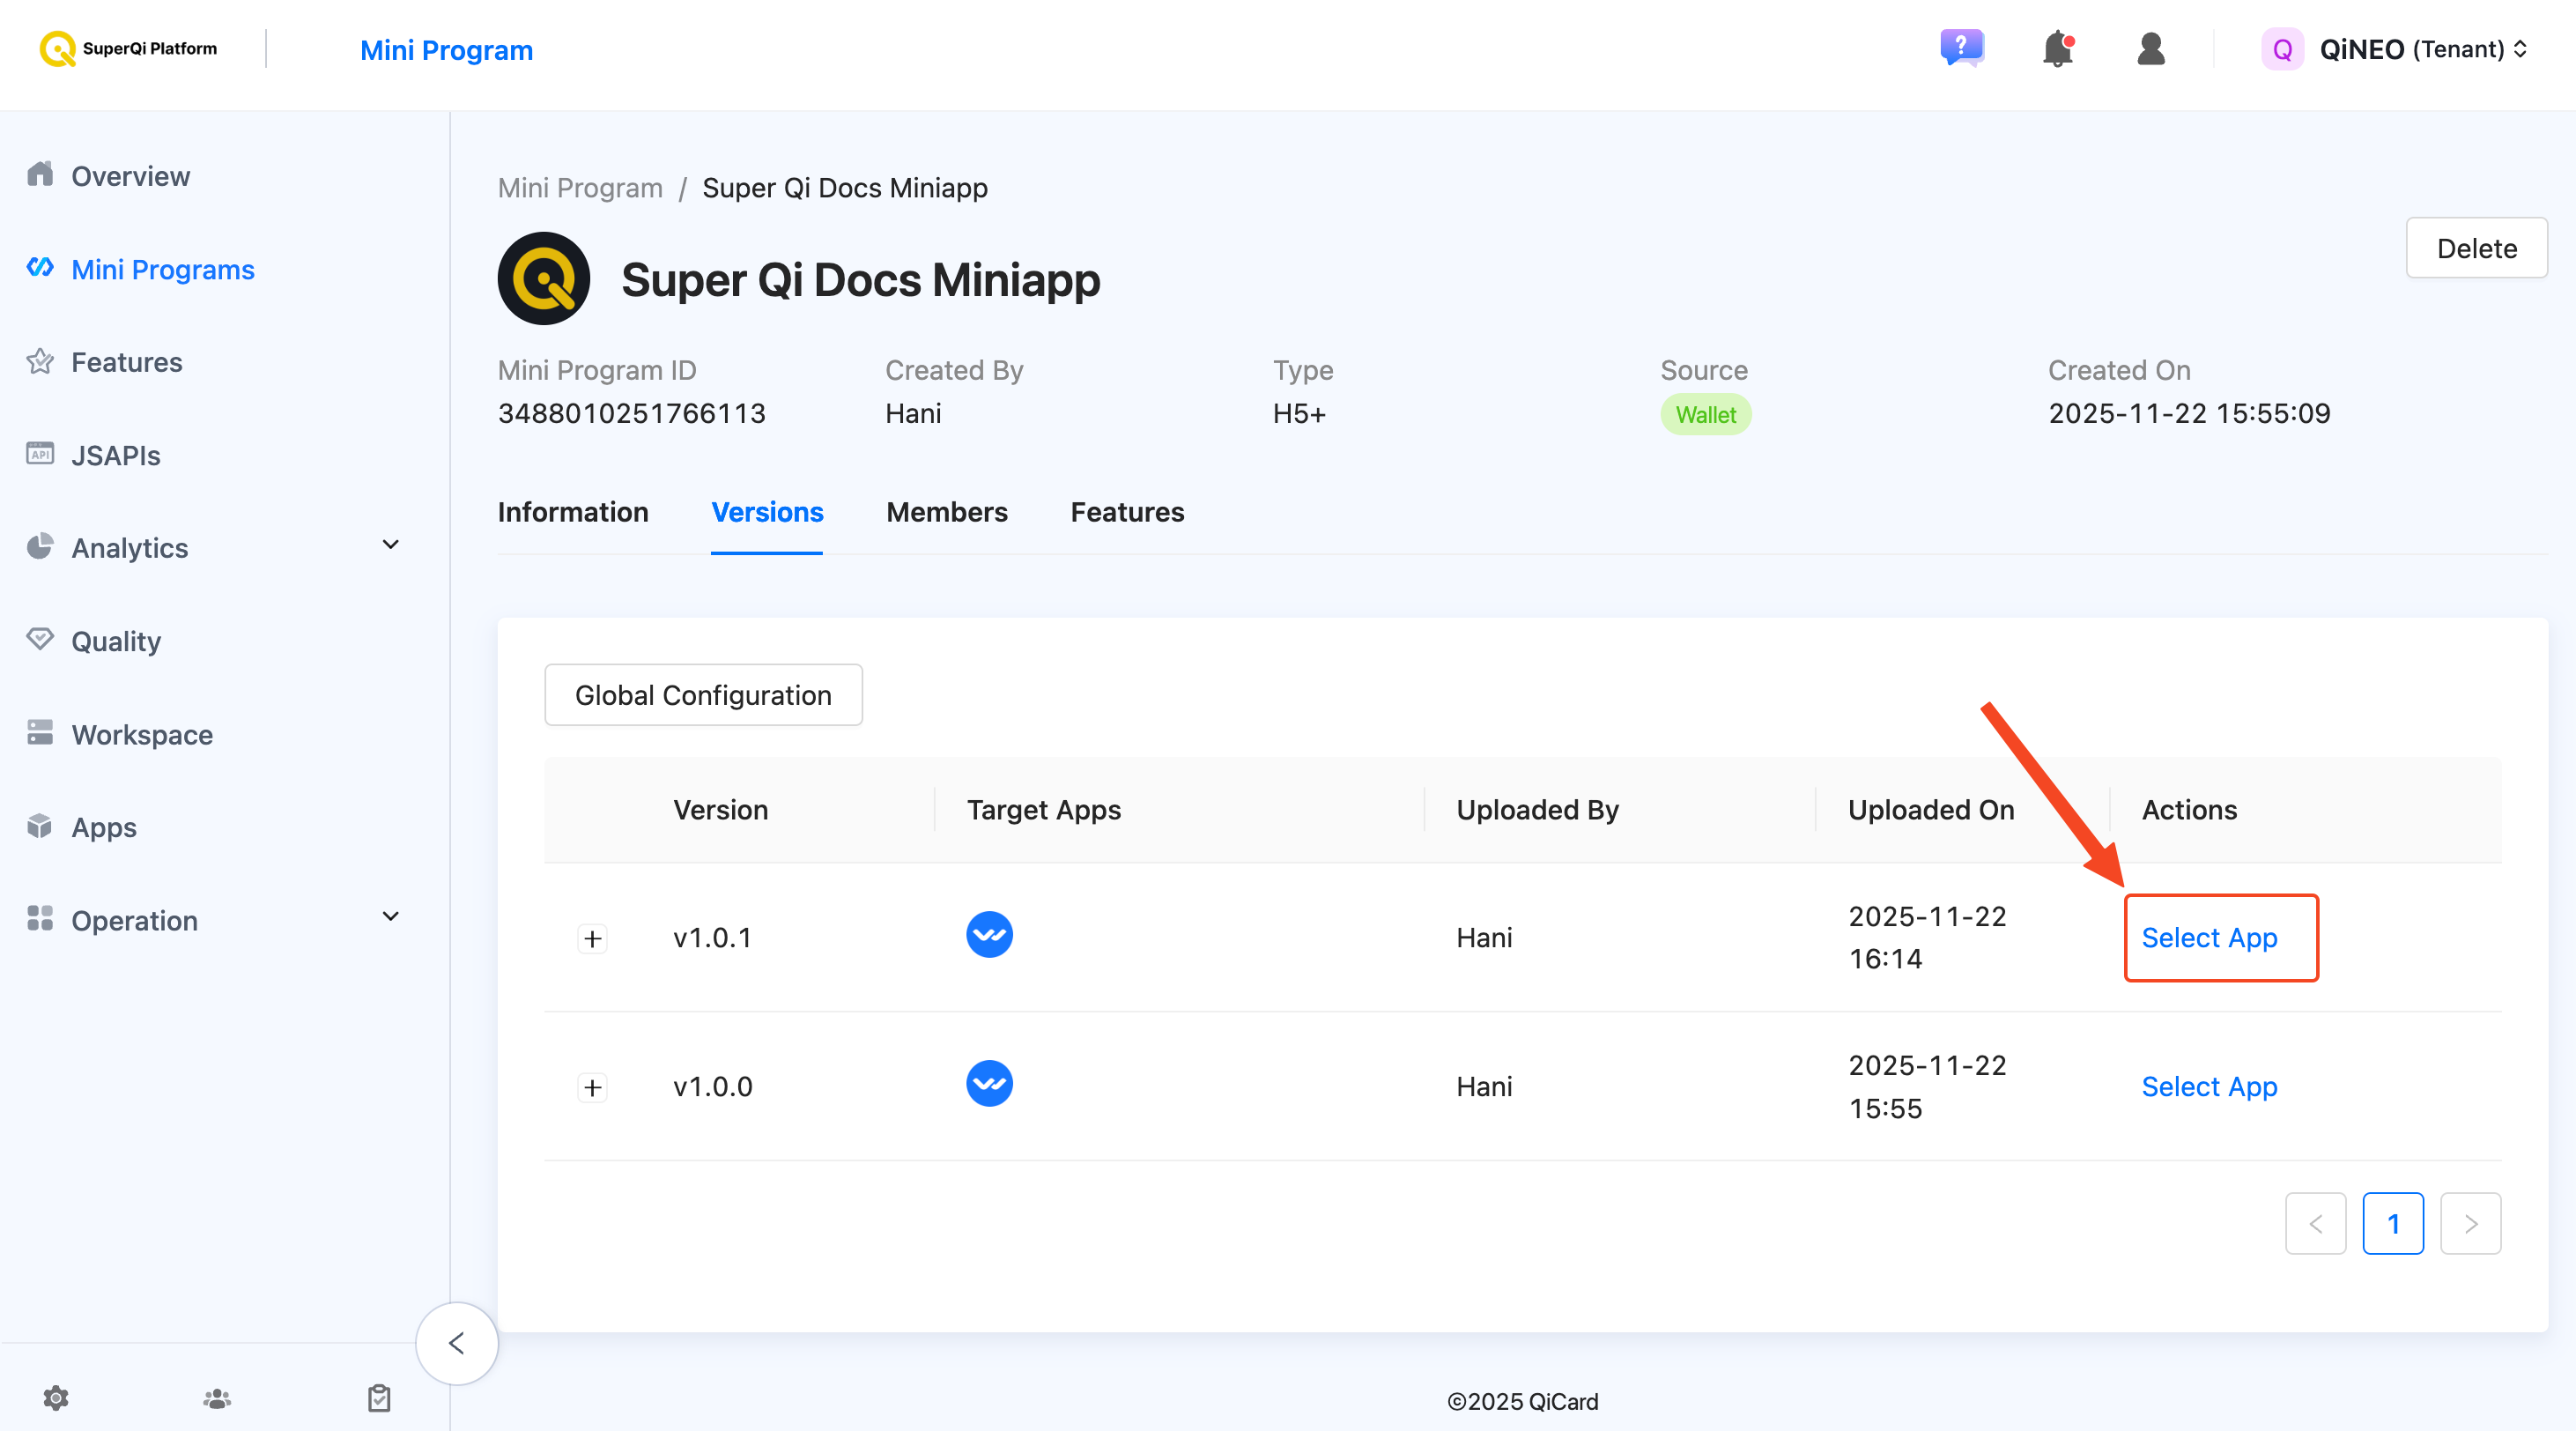
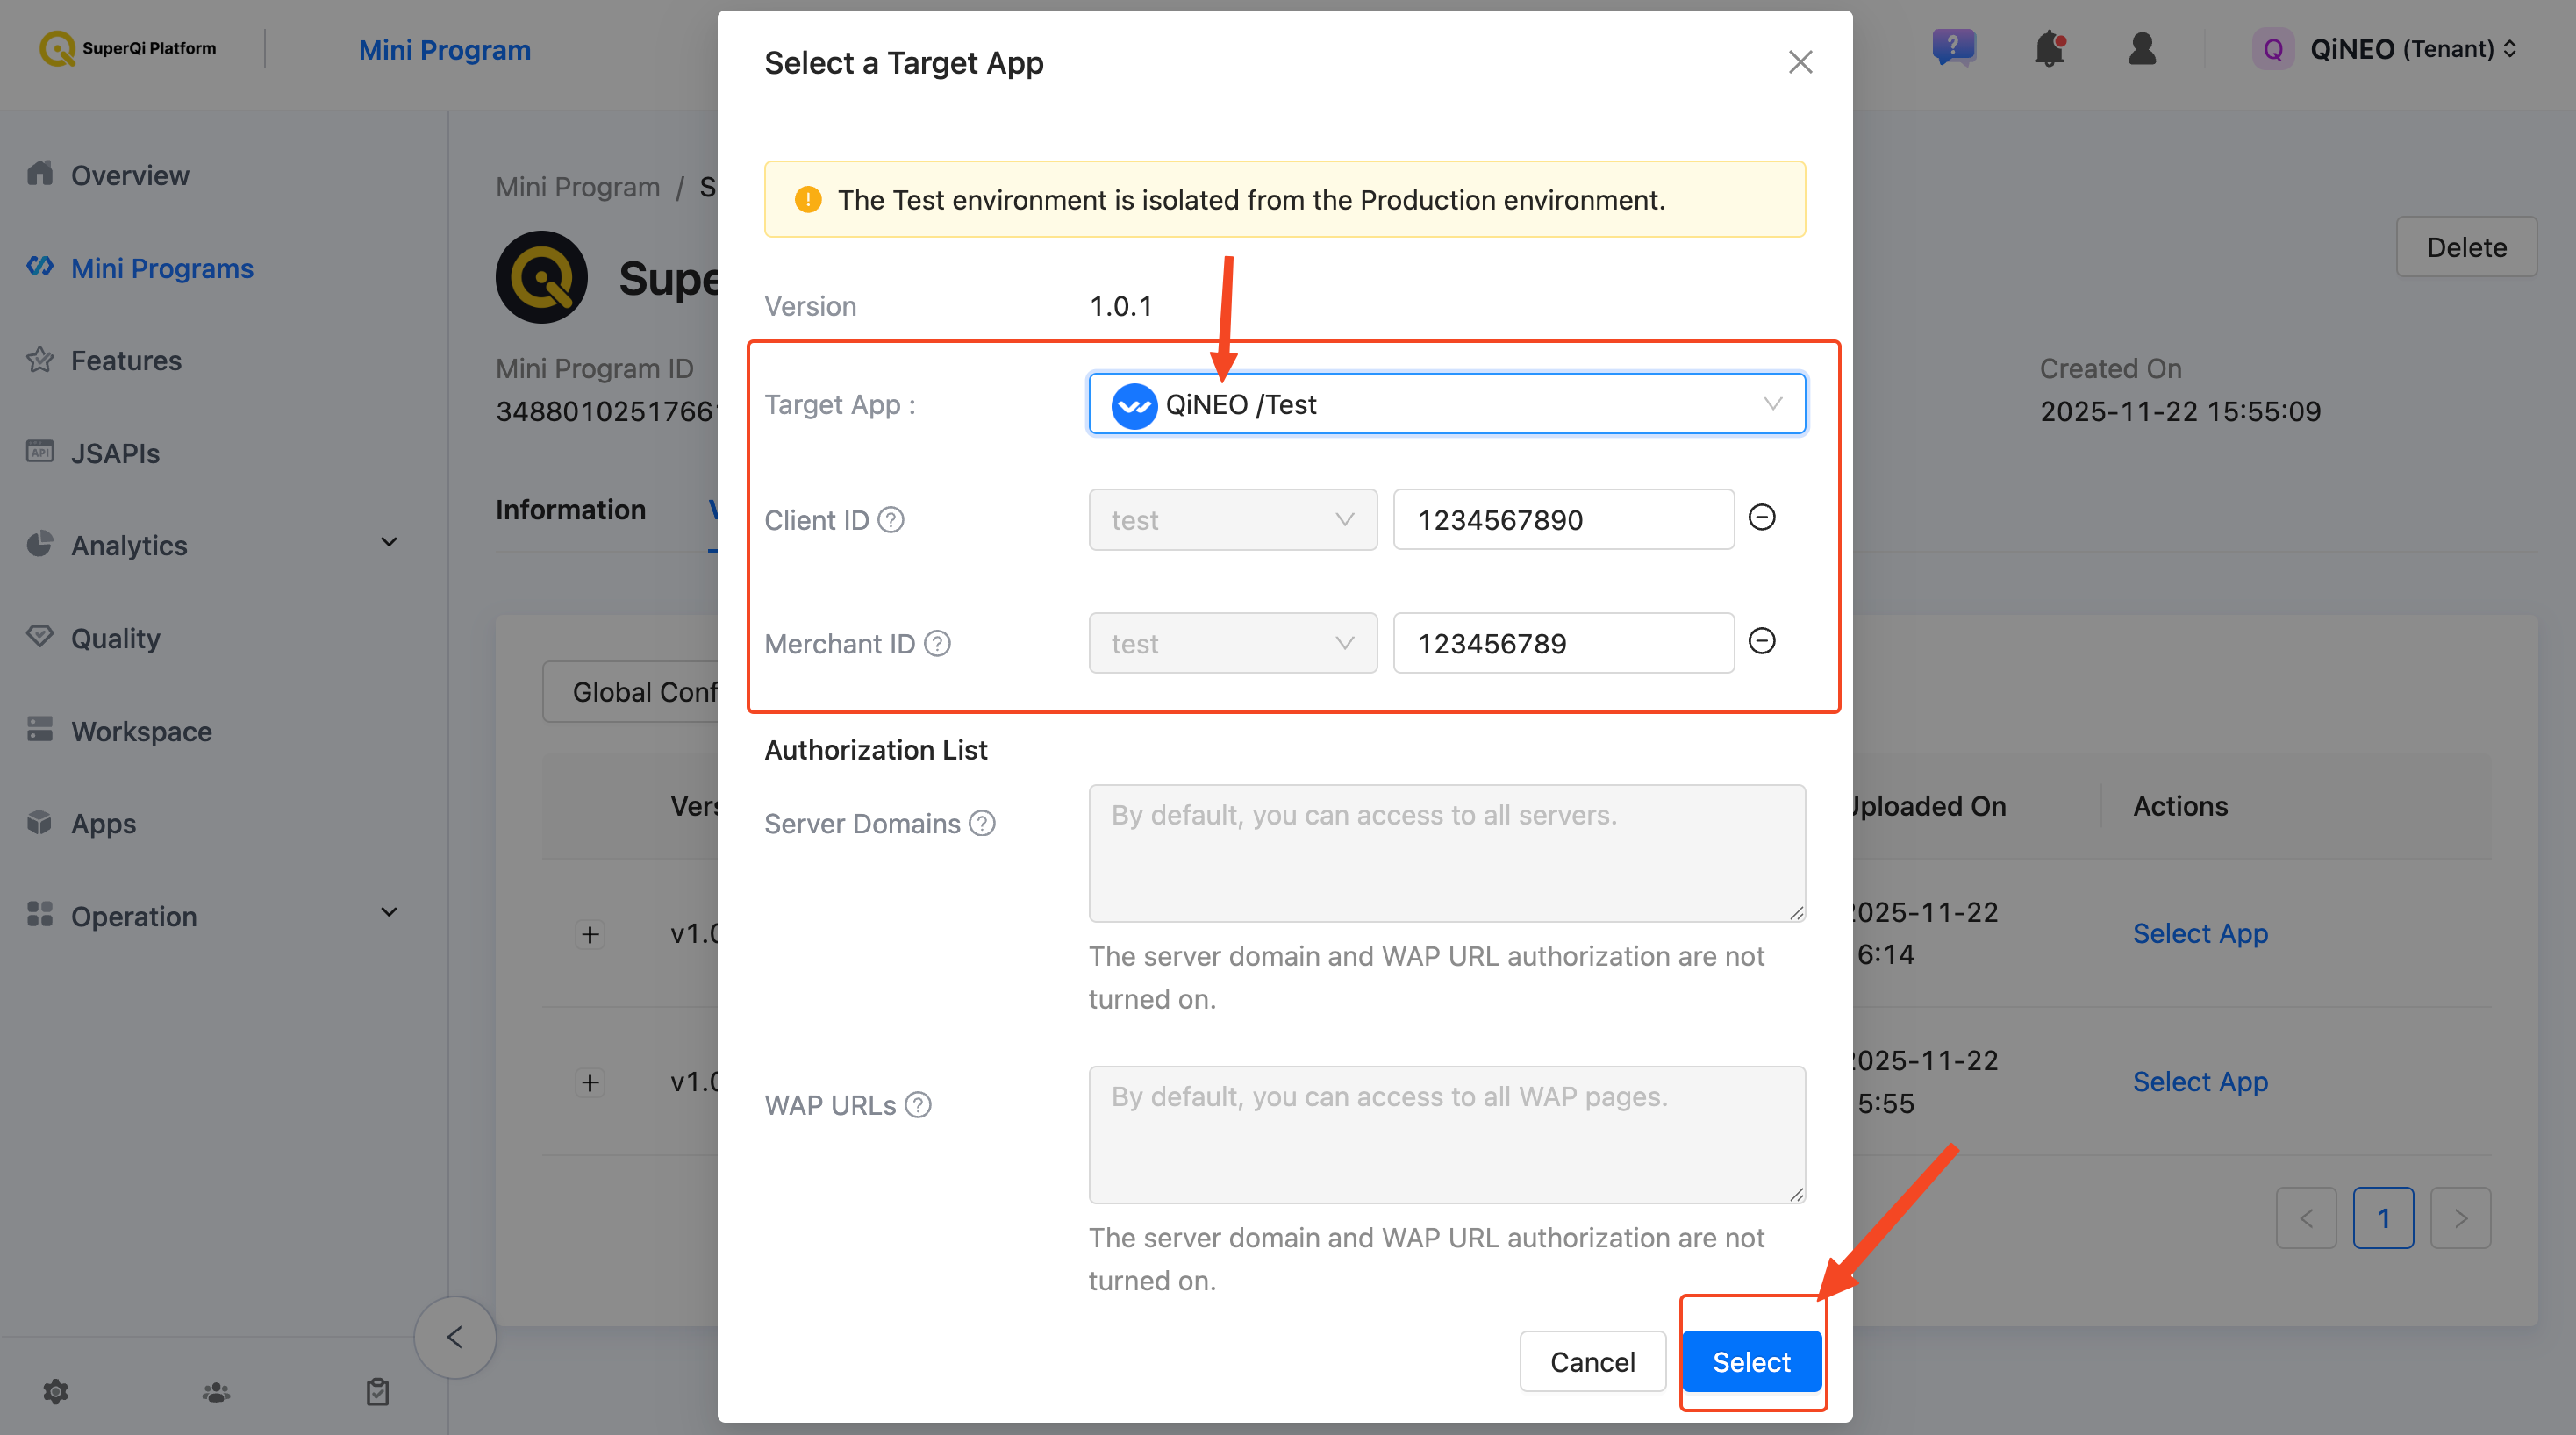
Step 7: Select Target App
In the selection dialog:
- Select the Target app with your / Test
- The Client ID and Merchant ID will be automatically filled
- Click Select to confirm
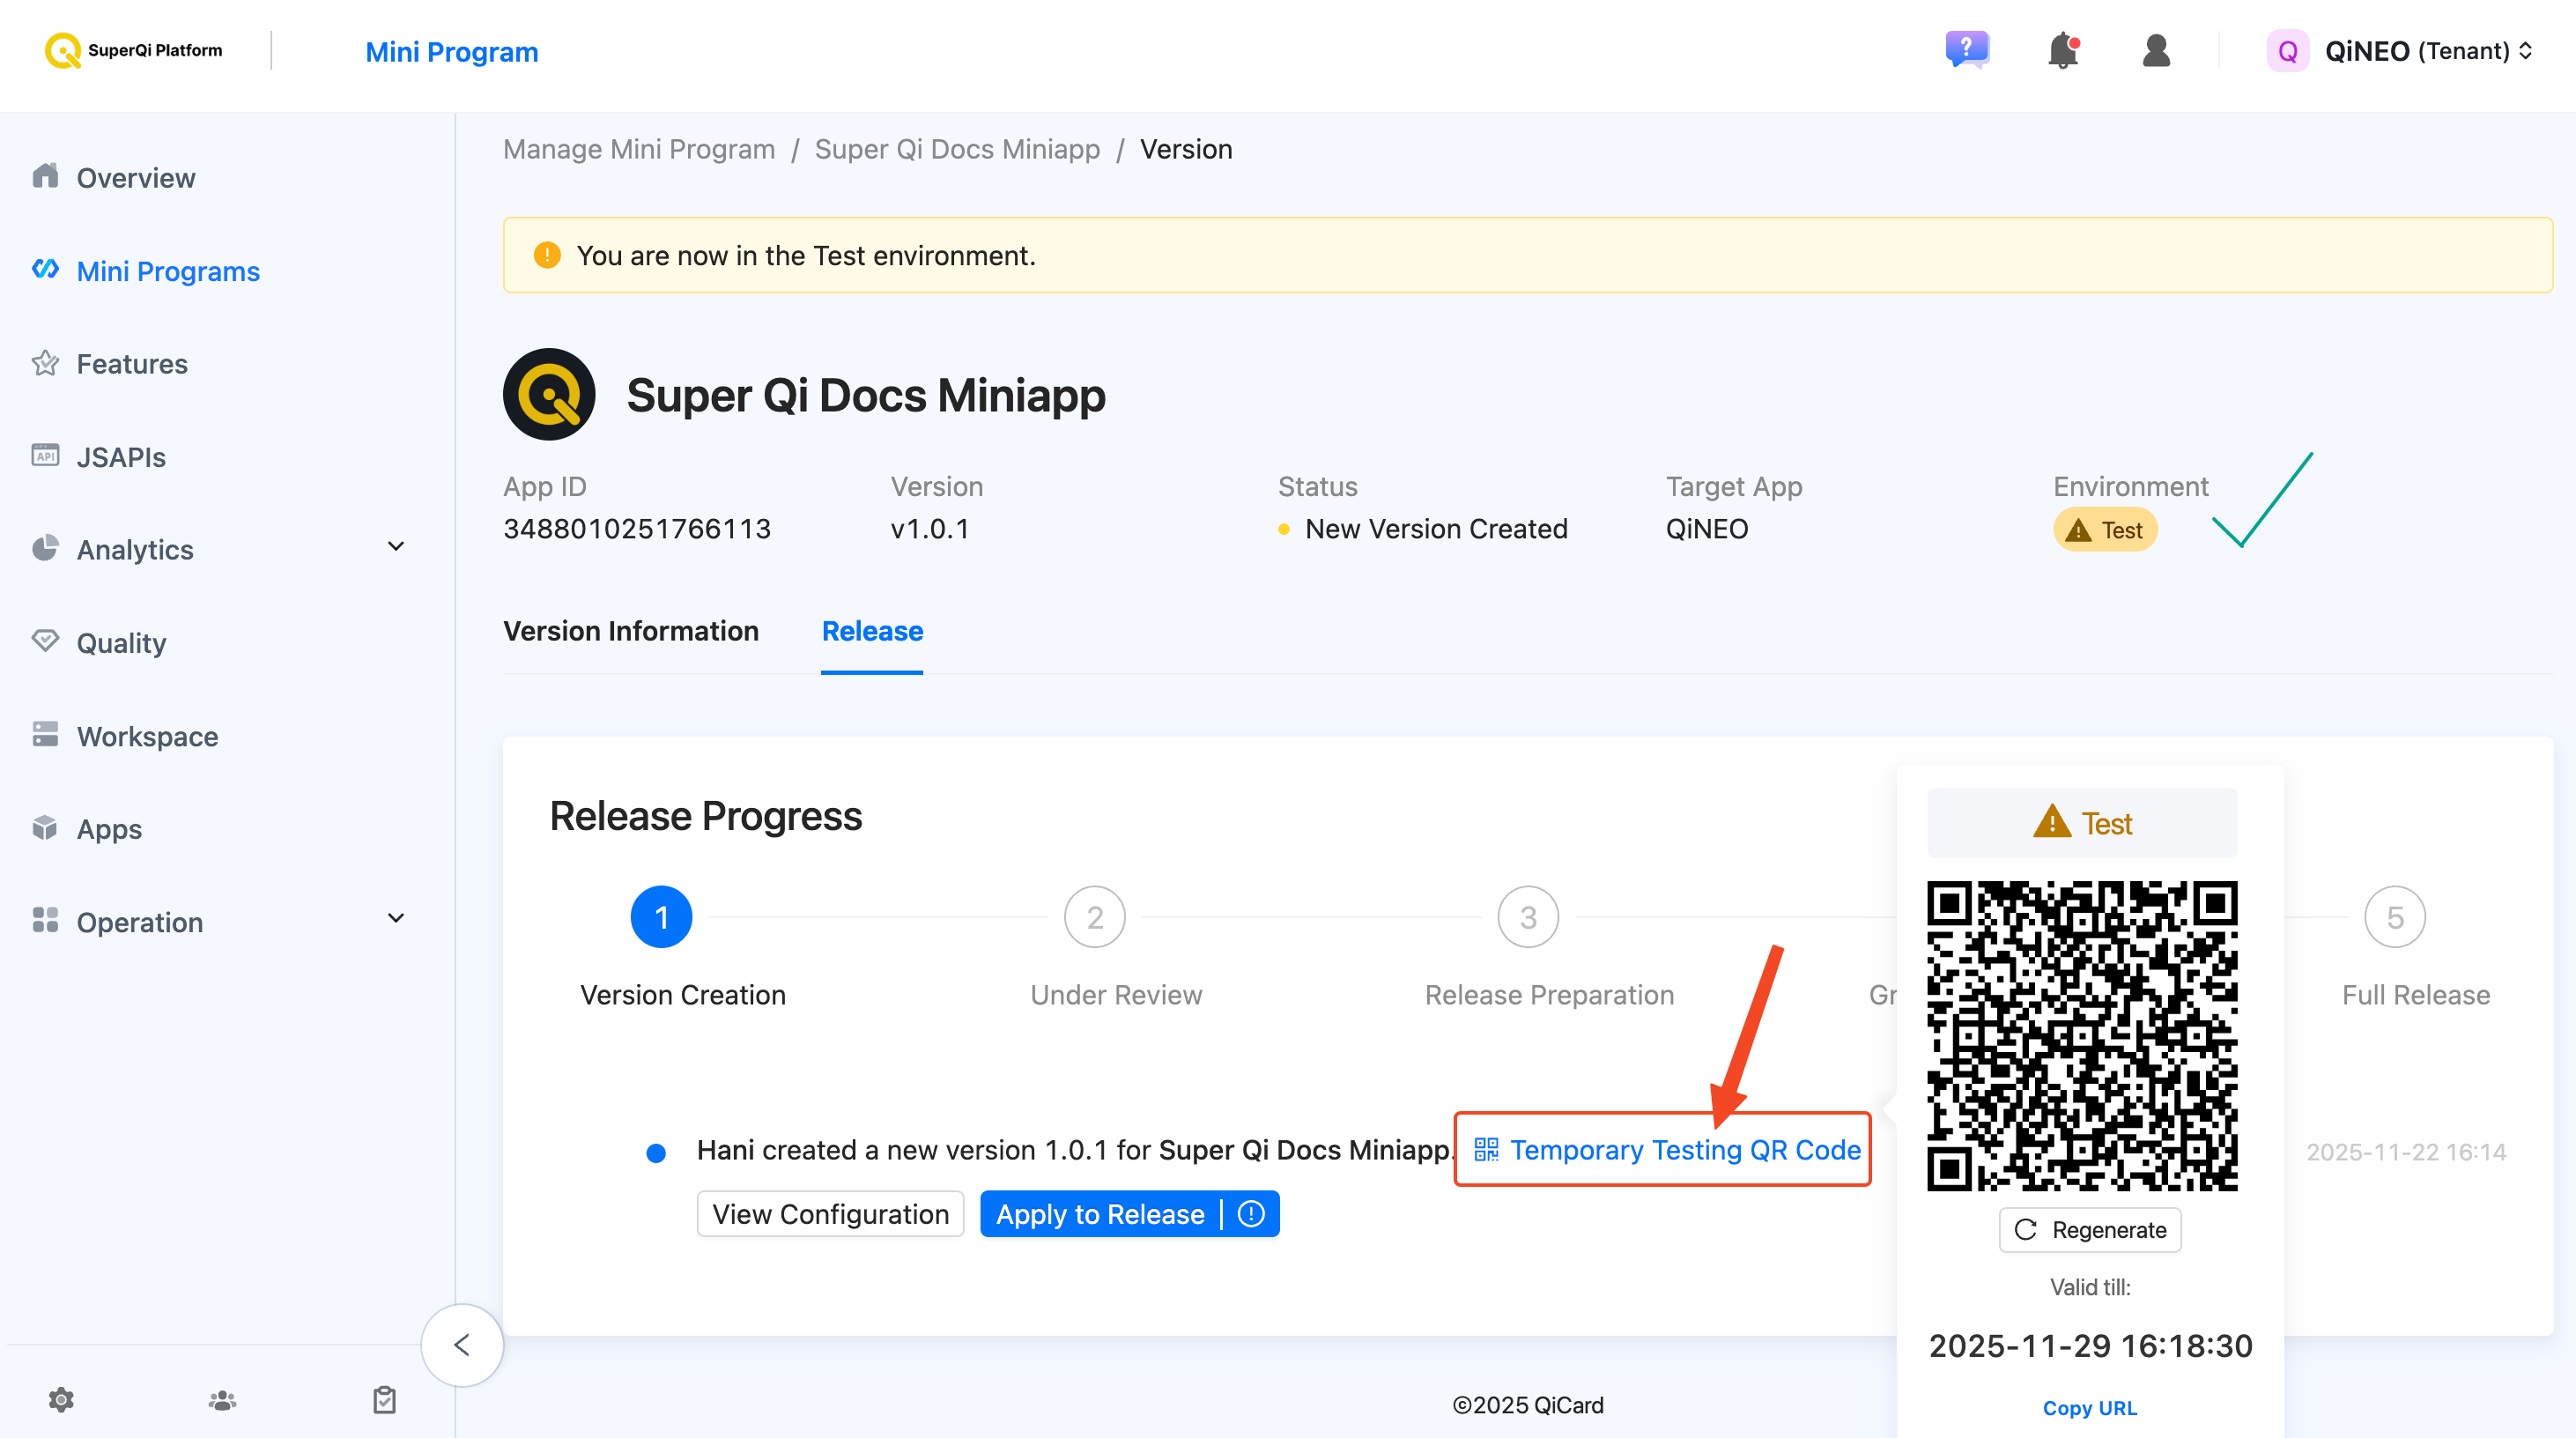
Step 8: Generate QR Code
Now you can see that the environment is set to Test. Click on Temporary Testing QR Code to generate your QR code.
Step 9: Scan QR Code in Super Qi UAT
Open your Super Qi UAT app and press the scan button to open the camera. Scan the QR code to open your first Miniapp.
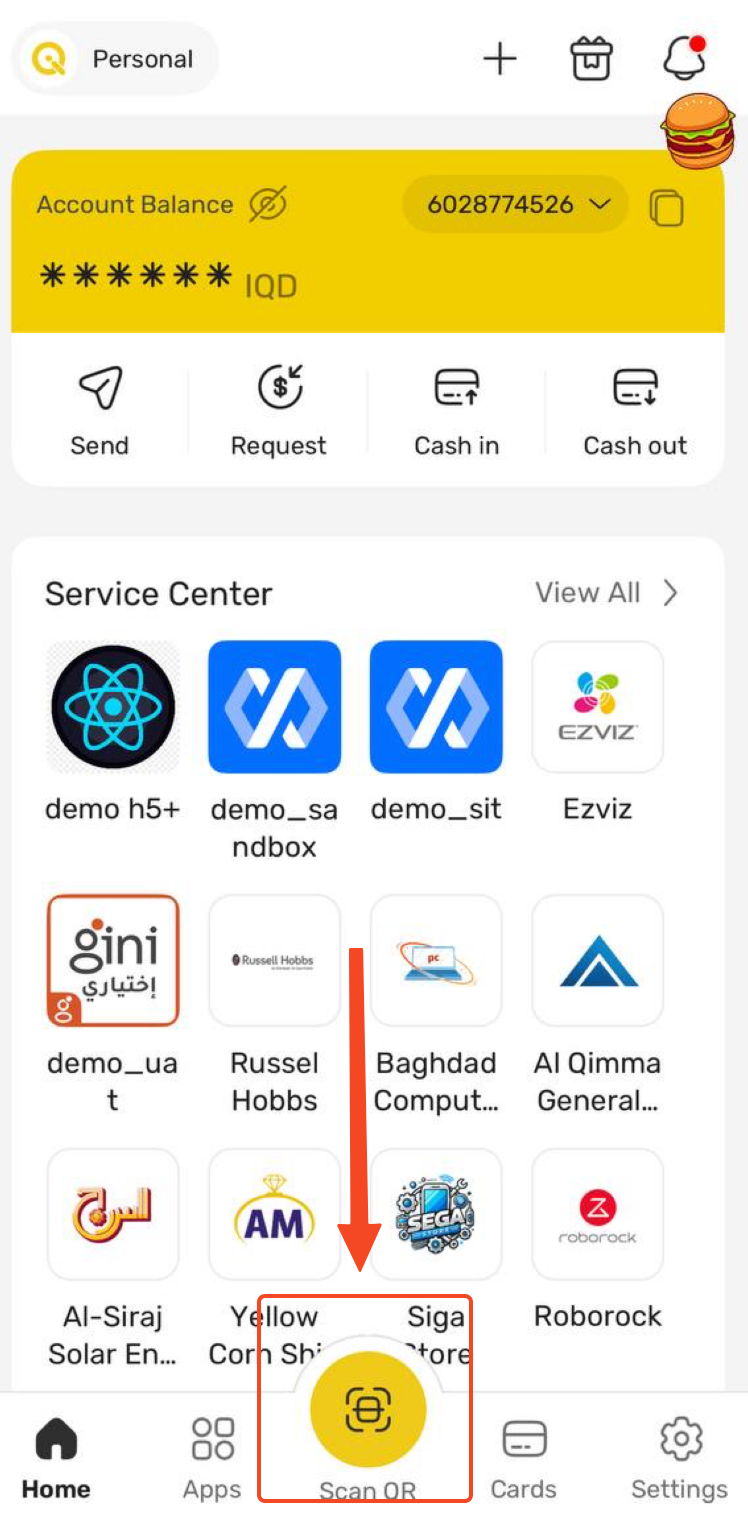
https://www.google.com as a placeholder. In the next section, we will change this to create your first Demo Miniapp.What's Next?
You have successfully configured your Miniapp for UAT testing! In the next documentation, we will set up a Demo Miniapp that has most of the functionalities used in Super Qi including authentications, payments, etc... and we will have it up and running when scanning the QR Code instead of getting Google.com
Ready to continue? The next section will guide you through creating your first Demo Miniapp.